 Add to Pinterest
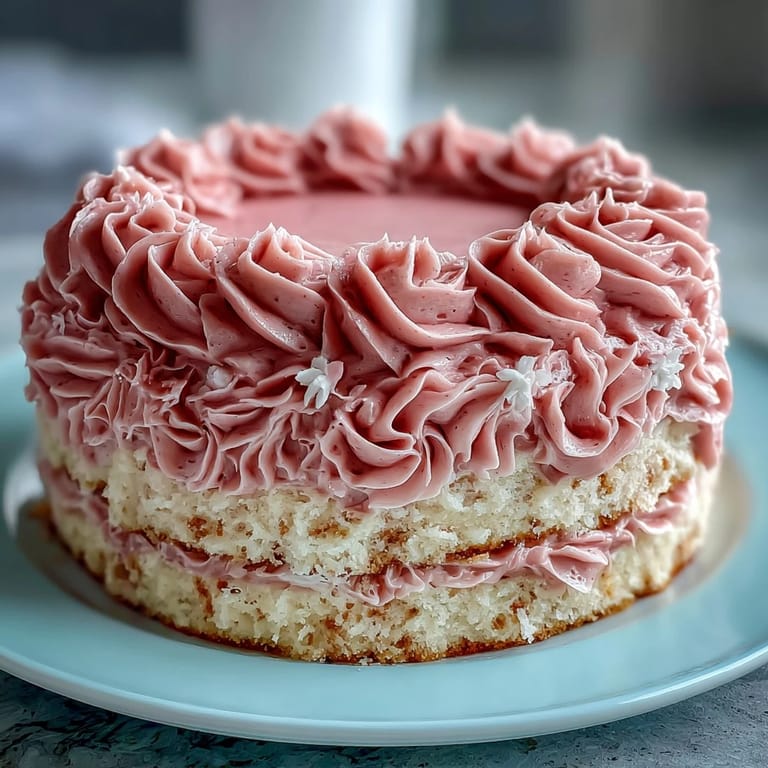
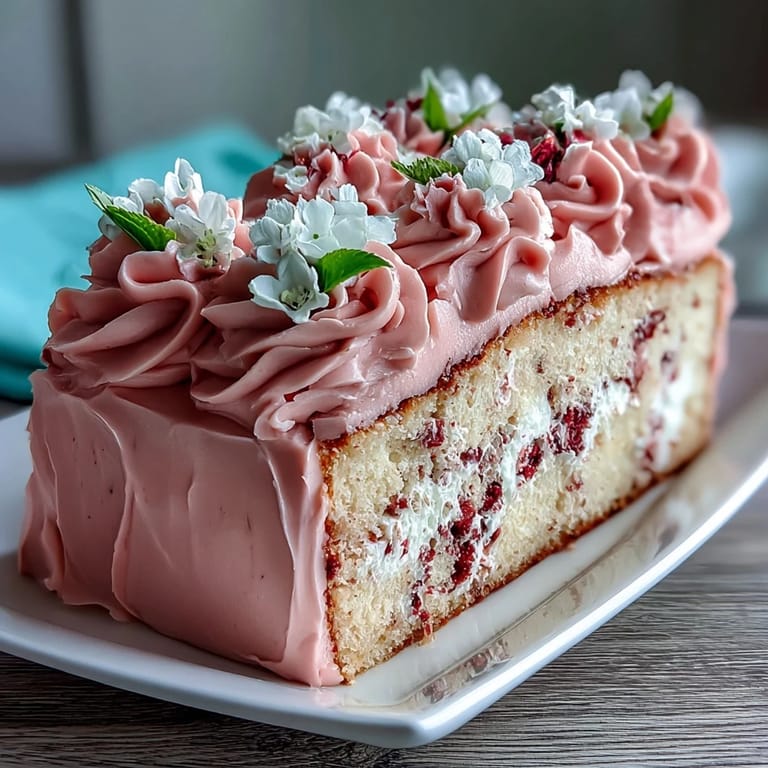
 My sister called me three weeks before Mother's Day in a panic—she'd committed to bringing dessert to our family brunch, then realized she had no idea what to make. I found myself describing this cake to her over the phone, watching her nervousness transform into excitement as I talked through the soft vanilla layers and that dreamy pink ombre frosting. By the time we hung up, she was already pulling out her mixer, and I knew this cake was about to become her secret weapon.
I baked this cake for a coworker's mom once, and watching her daughter's face light up when she saw it arrive at the office was the moment I realized it wasn't just about layers and frosting anymore. It became this small gesture of saying, "Your mom matters," without needing a single word.
Ingredients
- All-purpose flour (2 ½ cups): Room temperature ingredients matter here, but the flour should stay cool—measure it directly and don't sift it into the measuring cup, just level it off.
- Baking powder (2 ½ tsp): Double-check the expiration date because stale baking powder is the silent killer of layer cakes.
- Salt (½ tsp): This small amount brings out the vanilla without making the cake taste salty—don't skip it.
- Unsalted butter (1 cup for sponge, 1 ½ cups for frosting): Leave it out for about an hour until it's soft enough that your finger leaves a slight indent, this ensures smooth creaming and a fluffy crumb.
- Granulated sugar (2 cups): The creaming step with butter takes 3-4 minutes and should look pale and almost fluffy—rushing this changes the entire texture.
- Large eggs (4): Room temperature eggs blend seamlessly without creating lumps, so take them out of the fridge 30 minutes before mixing.
- Pure vanilla extract (1 tbsp for sponge, 2 tsp for buttercream): Use real vanilla, not imitation, because the frosting will taste noticeably more sophisticated.
- Whole milk (1 cup): Let it sit out until it matches room temperature so the batter emulsifies properly.
- Powdered sugar (5 cups): Sift it before measuring because lumps will ruin your buttercream's smoothness.
- Milk or heavy cream (2-3 tbsp): Cream gives richer flavor, but milk works perfectly fine if that's what you have on hand.
- Pink food coloring (gel preferred): Gel coloring delivers vibrant shades without diluting your buttercream like liquid coloring would.
- Edible flowers: Choose pansies, violets, or rose petals, and source them from a reputable supplier since not all flowers are safe to eat.
Tired of Takeout? 🥡
Get 10 meals you can make faster than delivery arrives. Seriously.
One email. No spam. Unsubscribe anytime.
Instructions
- Prep your pans and heat:
- Preheat the oven to 350°F and grease those three 8-inch round pans generously, then line them with parchment paper cut to fit the bottom—this prevents sticking and makes cleanup blissful. The parchment should sit flat, so I use a small dab of butter to stick it down before greasing again.
- Combine the dry ingredients:
- In a medium bowl, whisk together the flour, baking powder, and salt until everything is evenly distributed. This aerates the flour slightly and ensures the baking powder disperses throughout the batter without streaks.
- Cream butter and sugar into gold:
- Beat the softened butter and sugar together on medium-high speed for 3–4 minutes until the mixture turns pale, fluffy, and resembles wet sand—this step is where the cake gets its tender crumb. Don't rush it; that's where the magic happens.
- Add eggs gradually:
- Add each egg one at a time, waiting for the previous one to fully incorporate before adding the next, then pour in the vanilla extract. The batter might look slightly broken or curdled after each egg, but it will come together.
- Alternate flour and milk gently:
- Add about one-third of the flour mixture, then one-half of the milk, then another third of flour, then the remaining milk, then the last bit of flour—always ending with flour. Stir on low speed just until combined after each addition to avoid overworking the batter.
- Divide and bake:
- Split the batter evenly among the three prepared pans using an offset spatula, then slide them into the oven. After 25–30 minutes, insert a toothpick into the center—when it comes out clean or with just a few moist crumbs, they're done.
- Cool with patience:
- Let the cakes rest in their pans for 10 minutes so they firm up slightly, then turn them out onto wire racks to cool completely, which takes about an hour. Frosting a warm cake is an exercise in frustration, so make tea and wait.
- Beat butter into clouds:
- For the buttercream, beat the room-temperature butter on high speed for 2–3 minutes until it's pale and creamy, then gradually add the sifted powdered sugar while mixing on low. The gradual addition prevents clouds of powdered sugar from coating your kitchen.
- Create the ombre effect:
- Divide the finished buttercream into four bowls—leave one white and add increasing drops of pink gel coloring to the other three until you have light, medium, and dark pink shades. Mix each batch thoroughly so the color distributes evenly without streaks.
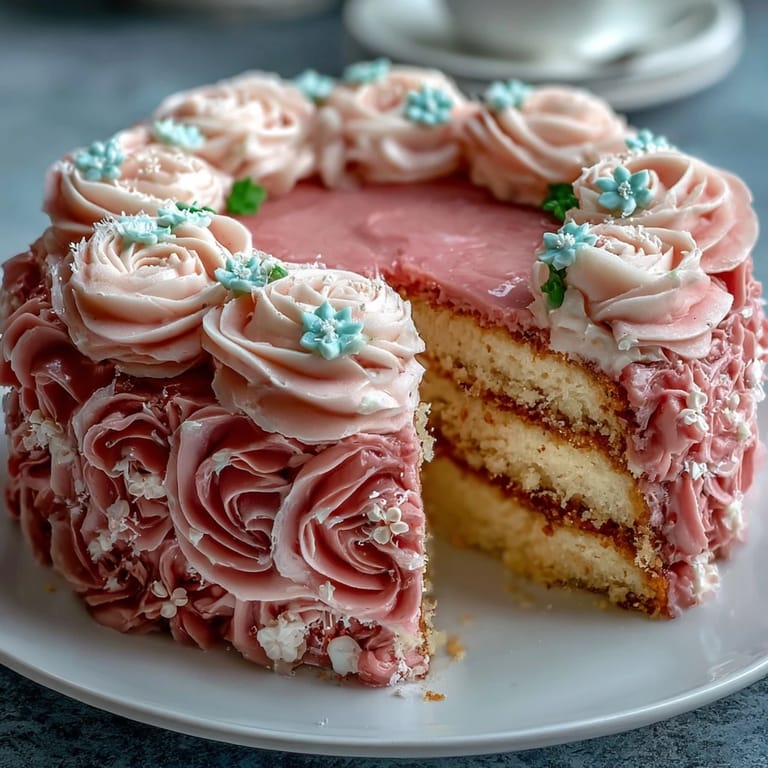
- Layer and frost like an artist:
- Place the first cake layer on your serving plate, then spread the darkest pink buttercream on top, add the second layer and spread medium pink, add the final layer and spread light pink on top. Frost the sides with the remaining white buttercream, using an offset spatula to smooth and blend if you want that ombre to flow down the sides.
- Smooth and chill:
- Run an offset spatula dipped in warm water over the frosting for a polished finish, then refrigerate the assembled cake for at least 30 minutes so it's easier to slice cleanly. Cold buttercream also holds those delicate flowers in place.
- Finish with flowers:
- Right before serving, arrange your edible flowers on top for maximum freshness and visual impact—they'll wilt if added too early.
 Add to Pinterest
 The first time I made this cake, my neighbor smelled the vanilla from her yard and knocked on my door asking what smelled like celebration. We ended up splitting the cake with coffee, and she told me stories about her own mother—suddenly this wasn't just a cake, it was an invitation to remember.
Why Gel Food Coloring Changes Everything
I used liquid food coloring my first attempt and ended up with buttercream that tasted faintly watery and looked more muddy than pink. Switching to gel coloring transformed the experience because the shades stayed vibrant and pure, and I didn't have to adjust the milk-to-frosting ratio just to compensate for added liquid. The buttercream now stays thick enough to create that beautiful ombre gradient without any compromise.
The Simple Syrup Secret
One Mother's Day, I brushed the cooled cake layers with a simple mixture of equal parts sugar and water that I'd heated and then cooled—it added this subtle sweetness and moisture that made the sponge feel like it was from a professional bakery. The brush soaks the cake just enough to keep it from drying out under all that buttercream, and it's one of those small moves that people always notice but can never quite pinpoint.
Flower Shopping and Storage
Finding edible flowers took me to farmers markets and specialty grocery stores where I learned that pansies, violets, and pesticide-free rose petals are the safest bet. I keep them in the fridge on damp paper towels the day before I need them, loosely covered, so they stay crisp without absorbing moisture.
- Always source edible flowers from reputable suppliers who specifically grow them for consumption, not from florists selling decorative flowers treated with chemicals.
- Brush the flowers dry with a soft pastry brush before placing them on the cake so they don't weep moisture into the frosting.
- Add fresh flowers just before serving to preserve their color and delicate texture, as they'll soften and brown if they sit on the cake too long.
 Add to Pinterest
 This cake has become my go-to when I want to say something meaningful without a card, and every time someone tastes it, there's this quiet moment of pure joy. That's when I know I've nailed it.
Recipe Questions & Answers
- → How do I achieve the pink ombre effect in the buttercream?
Divide the buttercream into four portions, leaving one white. Gradually tint the other three with increasing amounts of pink gel food coloring, then layer them from darkest to lightest for a smooth ombre look.
- → What type of flowers are safe for decorating the cake?
Use edible flowers such as violets, pansies, or rose petals to safely embellish the cake without compromising flavor or safety.
- → Can I prepare the cake layers in advance?
Yes, bake and cool the layers completely beforehand. For added moisture, brush them with simple syrup before assembling with buttercream.
- → What tools are essential for assembling this layered cake?
You will need 8-inch round pans, an electric mixer for buttercream, mixing bowls, an offset spatula for smooth layering, and optional bench scraper for blending the ombre effect.
- → How should the cake be stored before serving?
Chill the finished cake for at least 30 minutes before slicing to ensure clean cuts. Keep refrigerated and bring to room temperature before serving for best flavor.