 Add to Pinterest
 Last summer, my neighbor showed up at my door with a container of these bars, still cold from her car, and I bit into one while standing on the porch—the way the oats and nuts gave way to that honey-sweet chewiness made me immediately ask for the recipe. What struck me wasn't just how good they tasted, but that she'd made them in fifteen minutes without turning on the oven, which felt like a small kitchen miracle on a hot day. I've been making them ever since, tweaking the mix-ins based on whatever's in my pantry, and they've become my go-to when I need something substantial that isn't a sad desk lunch.
I made a double batch for a hiking trip with friends, and one person ate three bars before we'd even reached the trailhead—he kept saying he couldn't believe there was no refined sugar involved, that they tasted indulgent but actually fueled his body instead of crashing it. That moment stuck with me because it reminded me that snacks don't have to feel like a compromise; they can be genuinely nourishing and genuinely delicious at the same time.
Ingredients
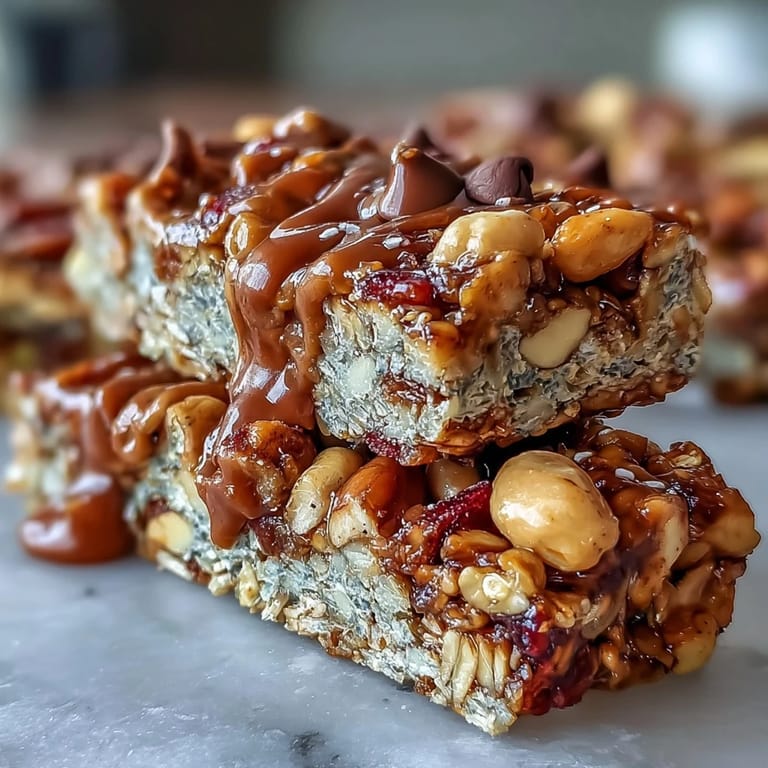
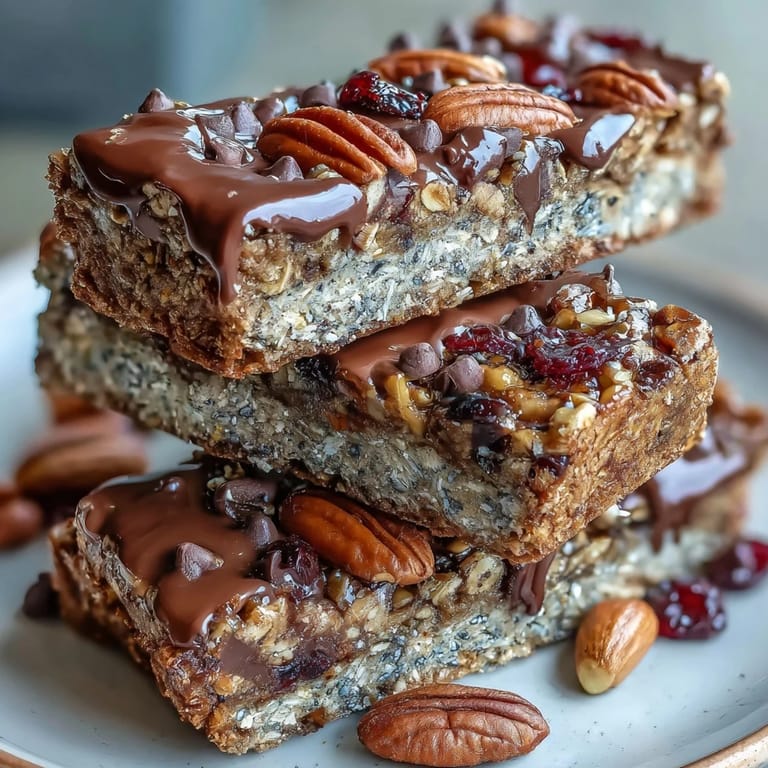
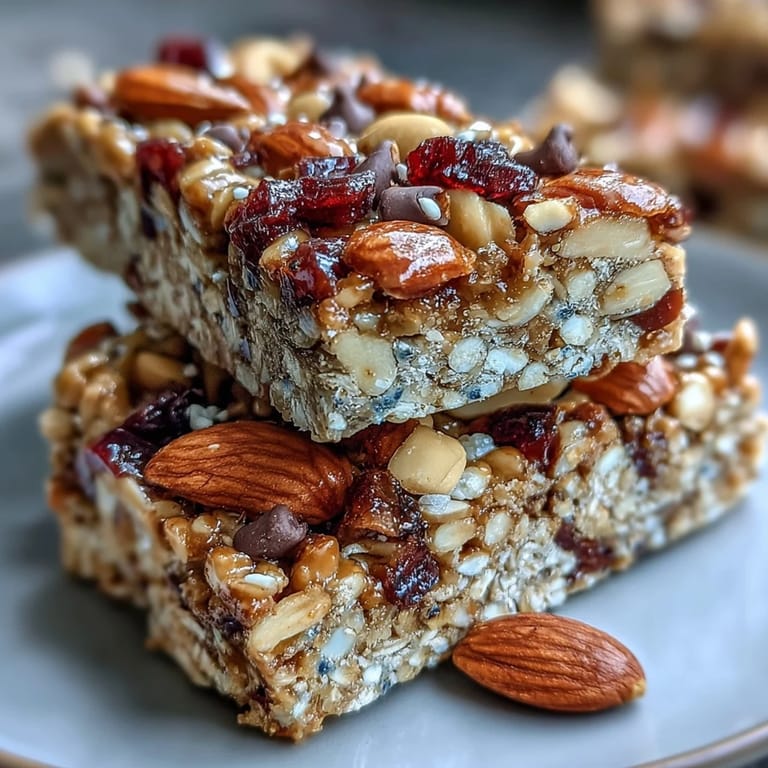
- Old-fashioned rolled oats (2 cups): Use the thick-cut kind, not instant—they hold their texture and give you that satisfying chew you want in every bite.
- Crisp rice cereal (1 cup): This adds airiness and a slight crunch that keeps the bars from becoming one dense brick.
- Mixed nuts, chopped (1/2 cup): Almonds, walnuts, and pecans all work, but don't skip the chopping step or you'll end up with awkward chunks.
- Dried fruit (1/2 cup): Cranberries offer tartness, raisins add natural sweetness—pick what appeals to you or use a mix for complexity.
- Unsweetened shredded coconut (1/4 cup, optional): This brings a subtle tropical note, and I've found it makes the bars feel more sophisticated without tasting weird.
- Salt (1/4 teaspoon): Don't skip this—it brightens all the other flavors and prevents the bars from tasting one-note sweet.
- Honey or maple syrup (1/2 cup): Honey gives you a more traditional granola flavor, while maple adds earthiness; either works beautifully.
- Creamy peanut or almond butter (1/3 cup): This is the binder that holds everything together, so use something with actual texture, not the ultra-smooth kind.
- Vanilla extract (1 teaspoon): A small amount that seems unnecessary until you taste how it rounds out the flavor profile.
- Mini chocolate chips (1/4 cup, optional): Add these only after the warm mixture cools slightly, or they'll melt into puddles.
- Chia seeds or flaxseed meal (1 tablespoon, optional): For extra nutrition and a subtle nutty taste that most people don't even consciously notice.
Tired of Takeout? 🥡
Get 10 meals you can make faster than delivery arrives. Seriously.
One email. No spam. Unsubscribe anytime.
Instructions
- Set up your pan:
- Line an eight-inch square baking pan with parchment paper, leaving a few inches of overhang on two sides so you can lift the finished bars out without wrestling with them. This small prep step saves you from broken bars and frustration later.
- Combine dry ingredients:
- In a large bowl, toss together the oats, rice cereal, chopped nuts, dried fruit, coconut if using, and salt until everything is evenly distributed. This even mixing matters because it ensures every bar gets a good blend of textures.
- Warm the binder:
- Place honey and peanut butter in a small saucepan over low heat, stirring frequently until they're melted and smooth, about two to three minutes. The mixture should feel warm to the touch but not hot enough to cook anything—you want it gentle and flowing.
- Stir in the vanilla:
- Remove the pan from heat and add the vanilla extract, stirring well so it distributes throughout the wet mixture. This single step makes a noticeable difference in how complex the flavor feels.
- Combine wet and dry:
- Pour the warm honey mixture over the dry ingredients and stir until everything is coated—nothing should look dry. This is where it starts to feel real, watching all those separate components come together into something cohesive.
- Optional chocolate step:
- Let the mixture cool for two to three minutes, then fold in chocolate chips if using, preventing them from melting into unrecognizable blobs. If you're impatient like I am, this wait feels longer than it is.
- Press into the pan:
- Transfer everything to your lined pan and press down firmly and evenly with a spatula or the flat bottom of a measuring cup. The pressure creates the right density—not so tight that they become rock-hard, but firm enough to hold together.
- Add toppings:
- Sprinkle any additional chocolate chips or nuts across the top and press them in gently so they stick as the mixture sets. This is where you can make them look intentional and special.
- Chill until set:
- Refrigerate for at least one hour, or until the bars are completely firm and no longer tacky on top. I usually let mine sit longer—overnight is ideal if you have the time.
- Cut and store:
- Lift the entire slab from the pan using the parchment overhang, place on a cutting board, and use a sharp knife to cut into twelve bars, wiping the knife between cuts for clean edges. Store everything in an airtight container in the refrigerator for up to one week, though honestly they never last that long in my house.
 Add to Pinterest
 My daughter asked to bring these to school as a snack for her class, and something about watching other kids' faces light up when they realized there was no baking involved made me understand why simple recipes matter. Food that comes together honestly, without tricks or excessive time, somehow tastes better and means more.
Why These Bars Work Every Time
The genius of this recipe is that it's forgiving—the oats and rice cereal create structure, the nuts add substance and flavor, the dried fruit brings natural sweetness and texture, and the honey-peanut butter binding is strong enough that you can't really mess it up. I've made versions with sunflower seed butter instead of peanut, added cardamom and cinnamon for warmth, even mixed in freeze-dried strawberries when I was feeling fancy. Each time, the bars came out chewy and satisfying, which tells me the formula is solid enough to handle experimentation.
Storage and Shelf Life
Keep these bars in an airtight container in the refrigerator, and they'll stay fresh for up to a week, though I'd eat them faster than that because they're easy to grab. If you want to make a larger batch, they freeze beautifully for up to three months—just wrap individual bars tightly in plastic wrap so they don't get freezer burn or pick up stray flavors.
Customization Ideas That Actually Work
The beauty of granola bars is that they're a canvas for whatever you're craving—swap the peanut butter for almond or sunflower seed butter if you need them nut-free, add a quarter teaspoon of cinnamon or cardamom for warmth, or use maple syrup instead of honey for an earthier taste. I've made a vegan version with maple syrup and dairy-free chocolate chips that fooled everyone into thinking they weren't dairy-free, and I've made a version with added chia seeds and flaxseed meal for friends who were extra health-conscious. The ratio stays the same; it's just the personalities that change.
- Experiment with dried fruit combinations—tart cranberries with sweet apricots, or raisins with coconut for tropical vibes.
- Toast your nuts slightly before chopping them to deepen their flavor and make each bar taste more intentional.
- Don't be afraid to add a pinch of sea salt on top after pressing, especially if you used unsalted nuts.
 Add to Pinterest
 These bars have become my answer to the question of how to eat well without making it complicated—they fit in a pocket, taste like a treat, and actually keep you satisfied. Once you make them once, you'll understand why they're worth keeping in regular rotation.
Recipe Questions & Answers
- → Can I substitute peanut butter with another spread?
Yes, sunflower seed butter works well as a nut-free alternative, maintaining creaminess and flavor.
- → What is the best way to store the bars?
Store in an airtight container in the refrigerator to keep them fresh for up to one week.
- → Can I add chocolate chips without melting them?
Allow the mixture to cool for a few minutes before stirring in chocolate chips to prevent melting.
- → Are these bars suitable for vegan diets?
Using maple syrup and dairy-free chocolate chips makes the bars vegan-friendly.
- → How long should the bars chill before serving?
Chill for at least one hour to let them set properly for easy cutting and handling.