 Add to Pinterest
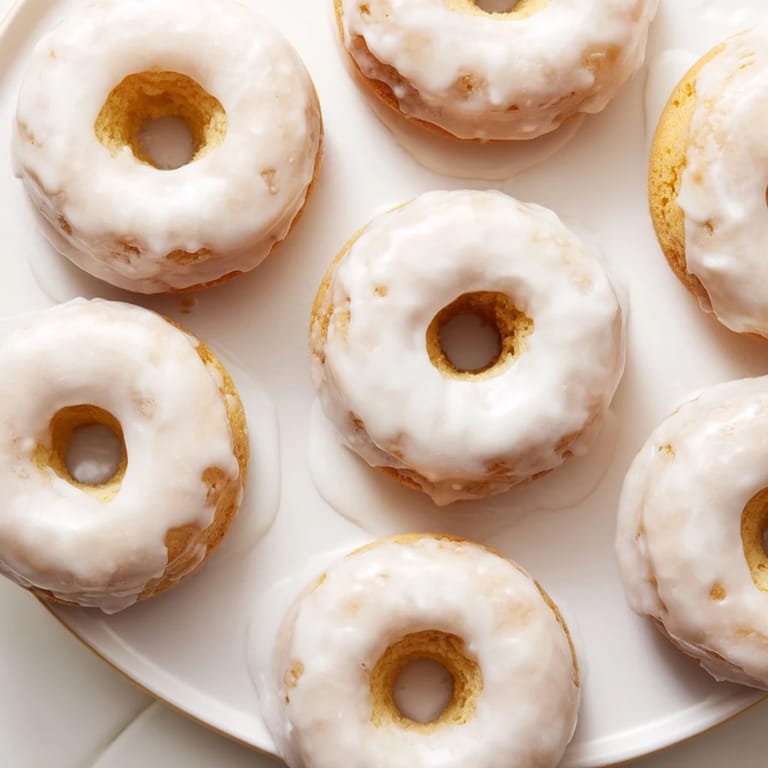
 There's something almost rebellious about making donuts without a deep fryer. I discovered these muffin tin donuts on a lazy Sunday morning when my kitchen had no counter space and my patience for oil splatters was at zero. What started as a shortcut became my go-to, because they somehow taste just as indulgent as the bakery versions but arrive on your plate still warm and somehow more forgiving. The nutmeg in the batter is the quiet hero here—it whispers rather than shouts, making each bite feel familiar and comforting.
I made these for my sister's book club, expecting them to be a simple side dessert. Instead, people kept sneaking back to grab seconds, and someone asked for the recipe before they'd even finished their first one. That's when I realized these weren't just convenient—they were genuinely delicious in a way that made people pause mid-conversation.
Ingredients
- All-purpose flour (2 cups): The foundation that keeps these light without being fluffy like a cloud, giving you that tender cake-donut texture everyone loves.
- Granulated sugar (2/3 cup): Sweetness that doesn't overwhelm; it lets the buttery, nutmeg-forward flavors shine through.
- Baking powder and baking soda (2 tsp and 1/2 tsp): The lift that makes them rise perfectly in the oven without any fussing.
- Salt and ground nutmeg (1/2 tsp each): Salt sharpens sweetness, while nutmeg is the secret ingredient that makes people ask what's different about your donuts.
- Whole milk (2/3 cup): Room temperature is key—cold milk can shock the other ingredients and throw off the texture.
- Unsalted butter, melted and cooled (1/2 cup): Always let it cool so it doesn't cook the eggs; melted butter gives a tender crumb that fried donuts can't match.
- Large eggs (2): At room temperature, they blend smoothly and bind everything without creating dense pockets.
- Pure vanilla extract (2 tsp): Use the real stuff—the flavor difference in something this simple is honestly night and day.
- Powdered sugar, sifted (1 1/2 cups): Sifting removes lumps that would make your glaze grainy and spotted.
- Milk for glaze (2–3 tbsp): Adjust gradually until you reach the consistency of thick cream; too thin and it slides off, too thick and it won't coat smoothly.
Tired of Takeout? 🥡
Get 10 meals you can make faster than delivery arrives. Seriously.
One email. No spam. Unsubscribe anytime.
Instructions
- Heat your oven and prep:
- Preheat to 350°F and grease your muffin tin—nonstick spray works better than butter because it gets into every corner without pooling. This 5-minute head start means your batter goes straight into a ready oven and rises evenly.
- Mix the dry team:
- In a large bowl, whisk flour, sugar, baking powder, baking soda, salt, and nutmeg together. Take your time here so the leavening agents are evenly distributed; this prevents dense spots in your finished donuts.
- Combine the wet ingredients:
- In another bowl, whisk milk, melted butter, eggs, and vanilla until smooth. Room-temperature ingredients blend together like they belong, creating a silky batter without lumps.
- Bring them together gently:
- Pour wet into dry and stir just until combined—overmixing activates gluten and makes tough donuts. Stop as soon as you don't see flour streaks; a few small lumps are your friends here.
- Fill the tin:
- Divide batter evenly, filling each cup about halfway. Half-full allows for rise without overflow, and even distribution means all 12 donuts bake at the same pace.
- Bake with patience:
- Bake 14–16 minutes until a toothpick comes out clean. The sweet spot is when the tops are golden and springy to the touch but still tender inside.
- Cool strategically:
- Leave them in the tin for 5 minutes to set slightly, then transfer to a wire rack. This brief rest prevents breakage while still letting them cool quickly so the glaze doesn't melt through.
- Make the glaze:
- Whisk powdered sugar, milk, and vanilla until smooth. It should be thick enough to coat but liquid enough to drip—test by dipping a donut halfway and watching the excess fall away cleanly.
- Glaze with confidence:
- Dip each cooled donut into the glaze, turning it gently to coat the top and letting excess drip back into the bowl. Return it to the rack and let the glaze set for 5–10 minutes before enjoying.
 Add to Pinterest
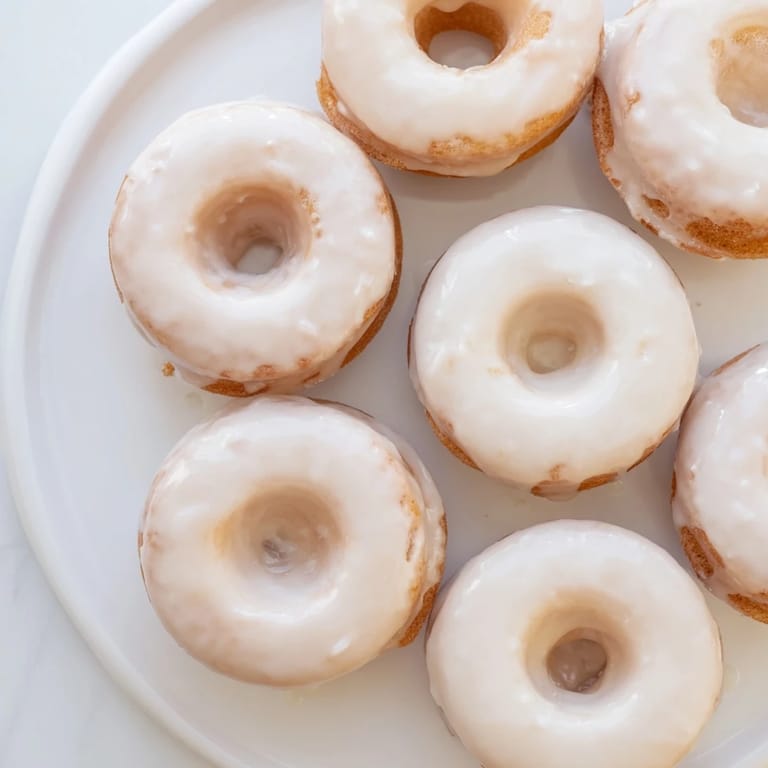
 I made a double batch one morning and my neighbors could smell them through the walls. Three of them showed up at my door within the hour asking what I was making, and I ended up handing out donuts still in their warm, soft stage. That moment when food becomes an excuse to connect with people—that's what these do.
Variation Ideas
Once you master the basic recipe, these donuts are a canvas for your mood. A brush of melted butter and a dip in cinnamon sugar while they're still warm from the oven feels nostalgic and cozy. Or skip the glaze entirely and dust them with powdered sugar for an easier, more delicate finish. I've added everything from almond extract to orange zest to the batter, and they've all worked beautifully because the base is so forgiving.
Storage and Freshness
These donuts stay tender for 2–3 days in an airtight container at room temperature, though they're honestly best on day one when the crumb is softest. If you want to bake ahead, make the unglazed donuts, let them cool completely, and freeze them in a single layer for up to two weeks. Thaw at room temperature for 30 minutes, then glaze fresh. I've also reheated them gently in a 300°F oven for 5 minutes to bring back that just-baked warmth.
Why This Method Actually Works
Baking instead of frying sounds like it might sacrifice flavor, but the truth is almost the opposite. The lower, gentler heat keeps the crumb from drying out while the glaze adds that glossy sweetness you crave. You're not losing anything except the mess and the labor—and honestly, both of those are worth losing. This is comfort food that doesn't demand a major production, which feels like the whole point of making donuts at home in the first place.
- Brown the butter slightly before cooling for a more complex, toasted flavor.
- Add 1/4 tsp cayenne pepper to the dry mix for a gentle spicy kick that plays beautifully with the nutmeg.
- Make extra glaze if you like thick, generous coats; it's impossible to regret doubling down on sweetness here.
 Add to Pinterest
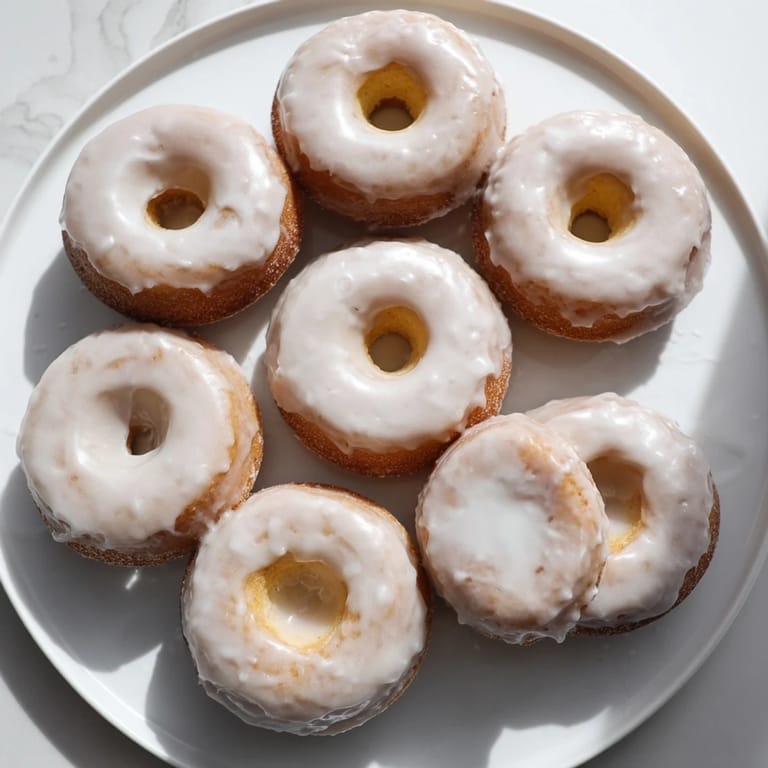
 These donuts prove that sometimes the best shortcuts are also the most delicious ones. Make them once and you'll understand why they've become my answer to every "bring something sweet" invitation.
Recipe Questions & Answers
- → Can I use a different type of flour?
All-purpose flour works best for the right texture, but you can try whole wheat or gluten-free blends with slight adjustments.
- → How do I make the glaze thicker or thinner?
Adjust the milk quantity gradually; less milk thickens the glaze, more milk makes it thinner for easier dipping.
- → Is it possible to bake these without a muffin tin?
The batter is tailored for a 12-cup muffin tin, but mini cake pans or silicone molds can be used with adjusted baking time.
- → How do I store these for later enjoyment?
Keep them in an airtight container at room temperature for up to 2 days or freeze after glazing for longer storage.
- → Can I make a dairy-free version?
Yes, substitute plant-based milk and butter alternatives to maintain softness and flavor without dairy ingredients.