Add to Pinterest
 My neighbor walked into my kitchen one Saturday and caught me piping a chocolate Betty Boop onto parchment paper with the focus of a surgeon. She laughed so hard she had to sit down. I was making this cake for my niece's retro cartoon party, and I'd already burned two chocolate silhouettes trying to get the hair curl just right. The cake itself was already chilling, layers of vivid red velvet stacked with tangy cream cheese frosting, and the whole kitchen smelled like cocoa and vanilla. When I finally placed that crisp chocolate cutout on top and stepped back, even my skeptical neighbor admitted it looked like something from a bakery window.
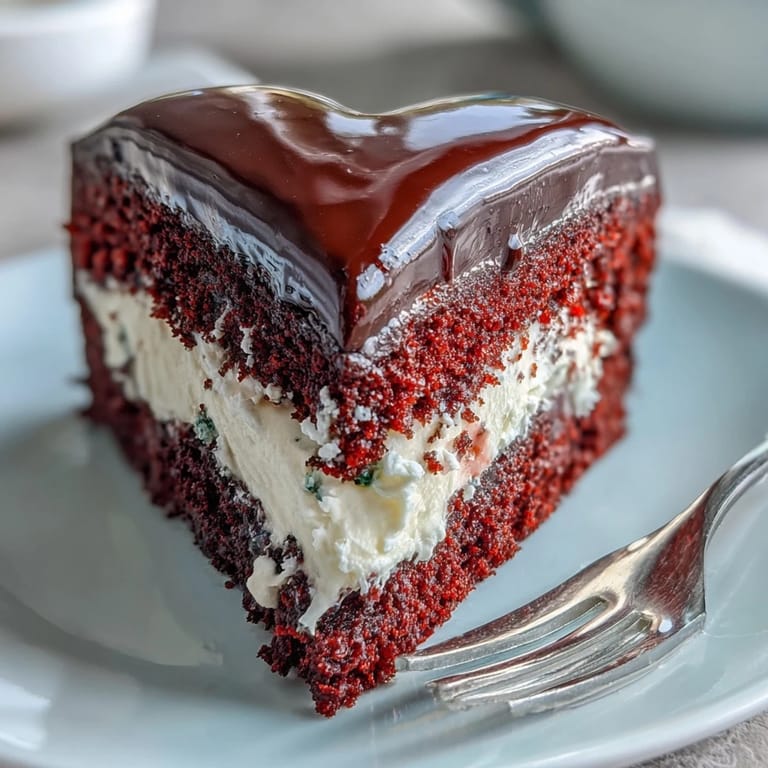
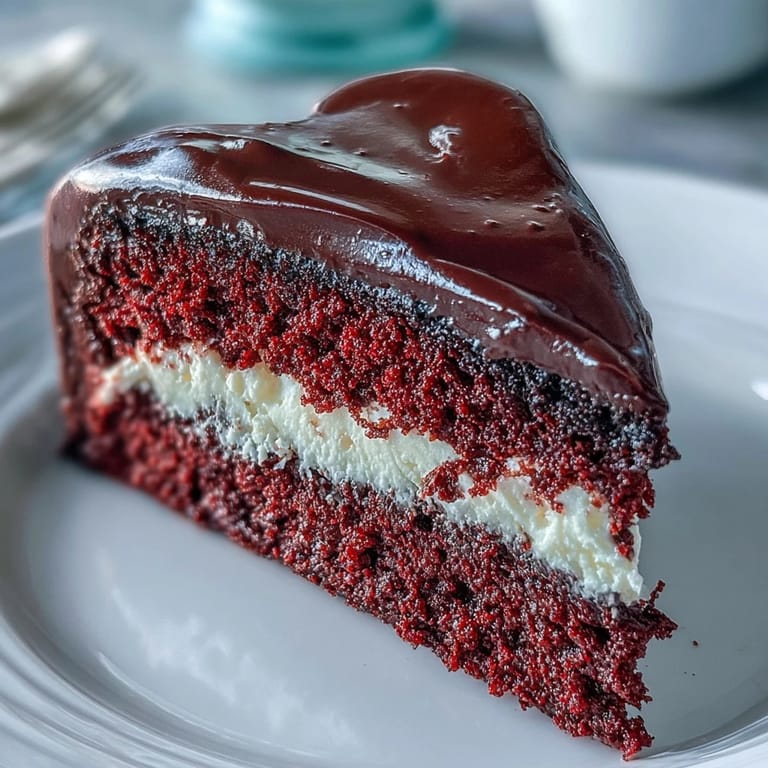
I made this cake again for a friend's birthday brunch, and it sat in the center of the table like a piece of edible art. Everyone hesitated to cut into it at first, snapping photos from every angle. But once we sliced through that glossy frosting and revealed the crimson crumb inside, forks moved fast. One guest scraped her plate clean and asked if I'd teach her how to make the chocolate cutout, admitting she'd always been intimidated by tempering chocolate.
Ingredients
- Cake flour: Sifted cake flour creates a delicate crumb that melts on your tongue, far softer than all-purpose flour would allow.
- Natural unsweetened cocoa powder: Just enough to deepen the flavor without turning this into a chocolate cake, it adds earthy warmth.
- Baking powder and baking soda: The combination gives the cake lift, and the vinegar activates the soda for an extra-light texture.
- Unsalted butter: Room temperature butter creams beautifully with sugar and keeps the cake moist for days.
- Granulated sugar: Beaten with butter until fluffy, it traps air and creates that classic tender crumb.
- Eggs: Room temperature eggs blend smoothly into the batter and help bind everything together without deflating the air you've whipped in.
- Buttermilk: The acidity tenderizes the gluten and reacts with the baking soda, giving you a cake that practically dissolves on your tongue.
- Red gel food coloring: Gel won't water down your batter like liquid dye, and it gives you that bold, classic red velvet hue.
- Pure vanilla extract: A must for fragrance and depth, it rounds out the cocoa and complements the tangy frosting.
- White vinegar: It activates the baking soda and reacts with the buttermilk, creating a light, airy crumb with a slight tang.
- Cream cheese: The star of the frosting, it brings tanginess and a velvety texture that clings to every bite.
- Powdered sugar: Sifted to avoid lumps, it sweetens and thickens the frosting into a spreadable cloud.
- Dark chocolate or candy melts: Melted and piped onto parchment, it hardens into a crisp, clean silhouette that contrasts beautifully with the soft frosting.
Tired of Takeout? 🥡
Get 10 meals you can make faster than delivery arrives. Seriously.
One email. No spam. Unsubscribe anytime.
Instructions
- Prep Your Pans:
- Preheat your oven to 350°F and grease two heart-shaped pans, then line the bottoms with parchment so the cakes release cleanly. This step saves you from heartbreak later.
- Mix the Dry Ingredients:
- Whisk together the cake flour, cocoa powder, baking powder, baking soda, and salt in a medium bowl. Set it aside while you work on the wet ingredients.
- Cream Butter and Sugar:
- Beat the room temperature butter in your stand mixer for a minute until it's creamy, then gradually add sugar and beat for 2 to 3 minutes until the mixture is light and fluffy. This step traps air and creates a tender crumb.
- Add Eggs One at a Time:
- Crack in one egg at a time, beating on low speed after each addition just until blended. Scrape down the bowl sides so nothing hides in the corners.
- Color and Flavor the Batter:
- Stir in the red gel food coloring, vanilla extract, and white vinegar until the batter is a vibrant, even red. The color should be bold and cheerful.
- Alternate Dry and Wet:
- With the mixer on low, add one-third of the dry ingredients, then half the buttermilk, mixing just until incorporated. Repeat with another third of dry, the rest of the buttermilk, and finish with the last third of dry ingredients to avoid overmixing.
- Activate the Baking Soda:
- In a small cup, combine 1 teaspoon vinegar with the baking soda and watch it foam. Gently fold this into the batter for an extra-light crumb.
- Bake the Cakes:
- Divide the batter evenly between your prepared pans, smoothing the tops with an offset spatula. Bake on the center rack for 25 to 30 minutes, or until a toothpick inserted in the center comes out clean.
- Cool Completely:
- Let the cakes cool in the pans for 10 minutes, then run a thin knife around the edges and invert onto wire racks. Remove the parchment and let them cool completely before frosting.
- Make the Cream Cheese Frosting:
- In a clean mixer bowl, beat the cream cheese and butter on medium speed for 2 minutes until smooth. Gradually add the powdered sugar and a pinch of salt, then the vanilla, beating until fluffy.
- Assemble the Layers:
- Level the cake domes with a serrated knife if needed, then place one heart layer on a cake board. Pipe or spread about three-quarters of a cup of frosting over the top, add the second layer, and press gently.
- Crumb Coat and Chill:
- Apply a thin crumb coat of frosting over the entire cake to trap any loose crumbs. Chill for 10 minutes, then add a final smooth layer of frosting, swirling or smoothing as you like.
- Create the Chocolate Silhouette:
- Place your printed Betty Boop stencil under a sheet of parchment and pipe or brush melted dark chocolate over the outline. Let it set at room temperature or chill for 10 minutes until firm.
- Add the Decoration:
- Carefully peel the chocolate silhouette from the parchment and lift it onto the center of the cake, pressing gently so it adheres to the frosting. The contrast between the dark chocolate and the creamy frosting is striking.
- Final Touches and Chill:
- Decorate the cake edges with frosting rosettes, edible glitter, or red sugar pearls if you like. Chill the cake for 30 minutes before serving so the frosting sets, and slice with a warm, clean knife for neat hearts.
 Add to Pinterest
 The first time I served this cake, my niece gasped when she saw Betty Boop perched on top of that glossy frosting. She made everyone wait while she took a dozen photos, and when we finally cut into it, the red crumb and creamy frosting created the perfect bite. That cake became the centerpiece of the party, and I've been asked to make it every year since. It's more than dessert now, it's a tradition.
Choosing the Right Chocolate
I've tried both dark chocolate and candy melts for the silhouette, and each has its charm. Dark chocolate gives you a rich, slightly bitter contrast that plays beautifully against the sweet frosting, but it can be temperamental if your kitchen is too warm. Candy melts are easier to work with, they set quickly and hold their shape without tempering, but the flavor is sweeter and less complex. If you want a brighter contrast, use white chocolate dyed black with oil-based coloring, it creates a striking pop against the red cake.
Storing and Serving
This cake keeps beautifully in the refrigerator for up to four days, covered loosely so the frosting doesn't pick up any odors. Let it sit at room temperature for about 20 minutes before serving so the frosting softens and the flavors come alive. I've found that slicing with a warm, clean knife gives you the neatest cuts, dip the blade in hot water, wipe it dry, and slice in one smooth motion. The heart-shaped slices look stunning on a plate, especially with a drizzle of raspberry coulis or a handful of fresh berries on the side.
Troubleshooting Common Issues
If your cake domes too much in the center, your oven might be running hot, try lowering the temperature by 10 degrees and baking a few minutes longer. If the frosting is too soft to hold its shape, chill it for 15 minutes and beat it again briefly before using. And if your chocolate silhouette cracks when you peel it from the parchment, it might be too thin, pipe a slightly thicker outline next time and let it set completely before handling.
- Always sift your powdered sugar to avoid lumps in the frosting.
- Use a turntable when frosting the cake for smoother, more even layers.
- If you don't have heart-shaped pans, bake in round pans and carve the hearts after cooling.
 Add to Pinterest
 Every time I make this cake, I remember that Saturday when my neighbor laughed at my chocolate-piping intensity, and it makes me smile. This cake is playful, nostalgic, and absolutely worth the effort.
Recipe Questions & Answers
- → How do I achieve vibrant red color without thinning the batter?
Use gel-based food coloring rather than liquid. Gel coloring provides intense pigmentation without adding excess moisture that could alter the batter consistency. Start with a small amount and gradually add more until you reach the desired shade.
- → Can I make the chocolate silhouette in advance?
Absolutely. Prepare the chocolate decoration up to two days ahead and store between sheets of parchment paper in an airtight container at room temperature. Handle carefully when transferring to the frosted cake to prevent cracking.
- → Why is room temperature ingredients important?
Cold ingredients can cause the butter to seize or create lumps in the batter. Room temperature butter, eggs, and dairy blend seamlessly, creating an emulsion that leads to even baking and a tender, uniform crumb throughout the finished layers.
- → How do I prevent the layers from doming?
Wrap the cake pan exteriors with cake strips or moistened towel strips during baking. This promotes even heating. If doming still occurs, level the cooled layers with a serrated knife before assembling and frosting.
- → What's the purpose of vinegar and baking soda combination?
This interaction creates a chemical reaction that releases carbon dioxide bubbles, contributing to the characteristic light and tender texture of red velvet. The vinegar also enhances the red coloring intensity and subtly balances the sweetness.