 Add to Pinterest
 My cousin's graduation party was supposed to have a traditional tiered cake, but when I arrived at her house that afternoon, we both looked at each other and laughed—she'd ordered three different sheet cakes instead, thinking she'd gotten variety. That happy accident became the inspiration for something even better: a sprawling dessert board that let everyone pick and choose their own celebration bites. No cutting, no serving stress, just pure joy watching her friends gravitate toward their favorites while the whole thing looked like edible art.
I'll never forget the quiet moment before everyone arrived when my cousin and I stood back and just admired what we'd created—the board glowing under her kitchen lights with all those colors and textures. Someone's mom walked in early, took one look, and immediately asked for photos. That's when I realized this wasn't just a dessert board; it was a centerpiece that made the whole celebration feel intentional and thoughtful, even though we'd basically assembled it together.
Ingredients
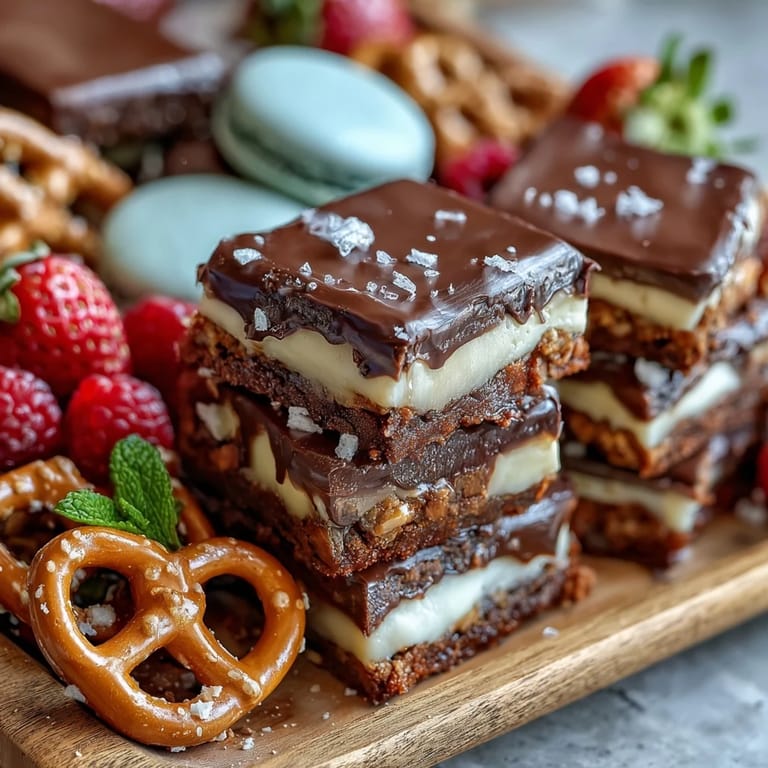
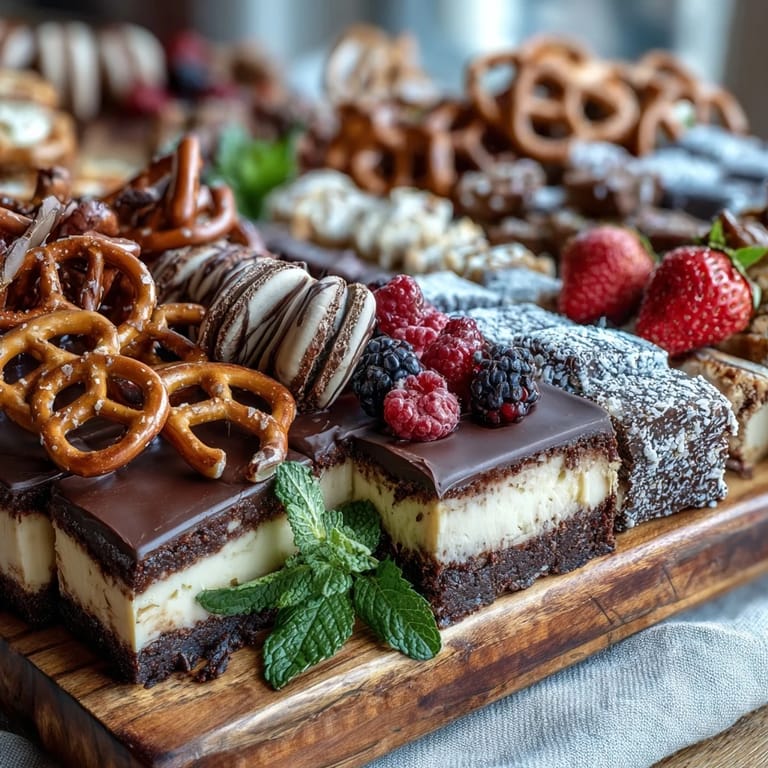
- Mini brownies (12): These are your anchors—they ground the board visually and offer that rich, fudgy comfort that makes people come back for seconds.
- Mini lemon bars (12): The brightness here cuts through sweetness and keeps people from dessert fatigue; they're the palate cleansers hiding in plain sight.
- Chocolate truffles (12): Luxury in bite-sized form, and honestly, they feel more elegant than they have any right to be considering how simple they are.
- Mini fruit tarts (4): These bring color and sophistication, plus they prove you didn't just phone it in with chocolate.
- Sheet cake, sliced (12 thin pieces): Go vanilla, chocolate, or funfetti depending on your crowd, but slice thin so people can easily grab one without the whole board toppling.
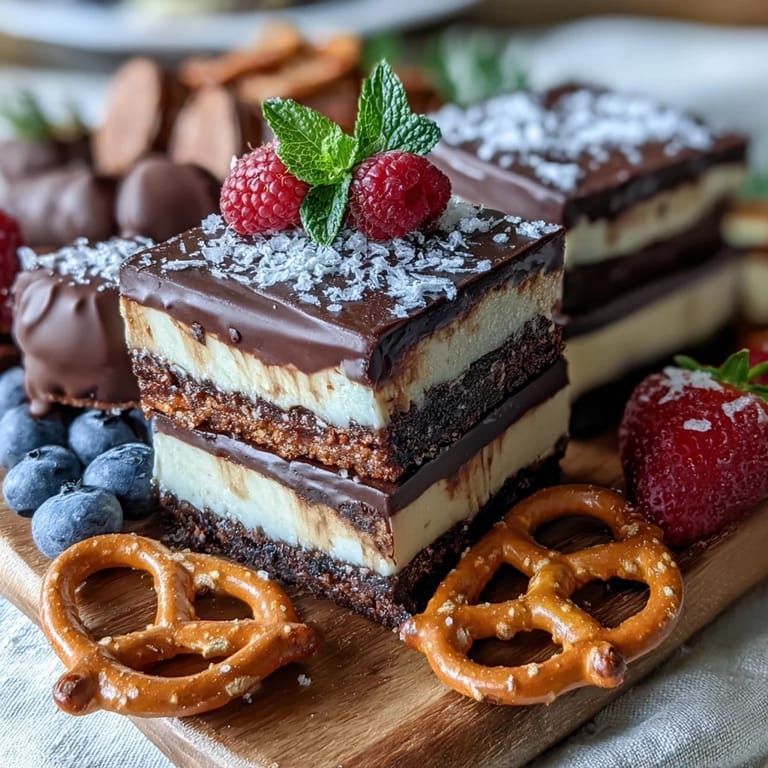
- Fresh berries (3 cups total): Strawberries halved, blueberries whole, raspberries untouched—they're the jewels that make everything look intentional.
- Seedless grapes (1 cup): They fill gaps naturally and give people a light option if they want something less heavy.
- Macarons (1/2 cup): Choose colors that echo your party theme and distribute them like confetti for visual rhythm.
- Mini meringues (1/2 cup): These are air and sweetness, and they add height variation that keeps the eye moving around the board.
- Chocolate-covered pretzels (1/2 cup): The salty-sweet contrast is non-negotiable, and they add that satisfying crunch people don't expect.
- Edible flowers (optional): If you use them, scatter them last and sparingly—they're the punctuation, not the paragraph.
- Fresh mint sprigs: A few tucked here and there add green life and make the whole thing feel garden-fresh.
Tired of Takeout? 🥡
Get 10 meals you can make faster than delivery arrives. Seriously.
One email. No spam. Unsubscribe anytime.
Instructions
- Pick your stage:
- Find a large wooden board, marble platter, or even a white ceramic tray—whatever feels right for your party's vibe. The surface is half the show, so choose something that will make your guests reach for their phones.
- Create the cake anchor:
- Arrange your cake slices in a gentle semi-circle or fan shape on one side of the board, standing them up slightly if they're sturdy enough or laying them flat and overlapping like cards. This becomes your visual focal point and gives structure to everything else.
- Build your clusters:
- Group the brownies, lemon bars, truffles, and fruit tarts in small piles around the cake, making sure different colors and textures live next to each other. Think of it like a puzzle where every piece makes its neighbors look better.
- Fill the spaces:
- Scatter piles of berries and grapes into the gaps between treats, creating little fruit islands that break up the richness. Let them nestle naturally rather than arranging them in lines—messiness actually looks more generous.
- Add the finishing textures:
- Sprinkle macarons, meringues, and chocolate-covered pretzels across the board like you're adding the final touches to a painting. These should feel distributed but not obsessively placed—let some cluster together and some stand alone.
- Garnish with intention:
- Tuck edible flowers into gaps if using them, and add sprigs of fresh mint for color and a hint of freshness that says someone cared. Step back and look at the whole thing—if any area feels bare or one color dominates too much, adjust before guests arrive.
- Time your serving:
- You can serve immediately, or cover loosely and refrigerate until the party starts, then set it out 20 minutes early so everything reaches that perfect not-cold-anymore temperature where flavors actually sing.
 Add to Pinterest
 There was this moment at the party when someone's grandmother, who usually just sits quietly at these things, leaned in and said this was the best way to do dessert—no pressure to pick, no waiting for cake to be cut, just abundance and choice and celebration all at once. It stuck with me that something so visually simple could actually change how people experienced the whole evening.
The Art of Arrangement
Spacing is everything here. When you're placing each element, think about negative space the way a florist thinks about it—too tight and the board feels anxious, too spread out and it looks lonely. I learned this by making the board too cramped the first time and having to relocate half the treats. The secret is to let your eye scan the whole thing and find resting places, spots where the eye can pause before moving to the next cluster.
Choosing Your Treats Strategically
The magic isn't in having the fanciest treats; it's in balance. You want something chocolate, something fruity, something salty, something delicate, and something substantial. I've seen boards that were all macarons look sparse, and boards that were just brownies look one-note. The variety is what keeps people moving around the board, discovering something new with each reach.
Serving and Storage Wisdom
The board works best when it's the centerpiece of the party, set out where people naturally drift. Avoid direct sunlight and warm spots near heat sources, or your chocolate will start sweating and your fruit will dry out. If you're making it ahead, cover it loosely with plastic wrap and refrigerate, then let it sit out before the party so flavors aren't muted and textures are perfect.
- Have small tongs or forks nearby so people can serve themselves without fingerprints all over everything.
- The board actually gets more beautiful as people eat from it—gaps reveal new colors underneath and it becomes this living, changing centerpiece.
- Leftovers keep covered in the fridge for two days, though honestly there usually aren't any.
 Add to Pinterest
 This board taught me that celebrations don't need to be complicated to feel special. Sometimes the most generous thing you can do is give people options and let them build their own moment of joy. It's become my go-to for any gathering where people matter more than showing off, which honestly, is every gathering.
Recipe Questions & Answers
- → What treats work best on this dessert board?
Mini brownies, lemon bars, chocolate truffles, and fruit tarts add variety in flavors and textures.
- → How should cake slices be arranged?
Arrange sliced cake in a semi-circle or fan shape for a visually appealing layout.
- → Can I customize the fruit selection?
Yes, fresh strawberries, blueberries, raspberries, and seedless grapes provide color and freshness, but you can swap based on seasonality.
- → Are there gluten-free options for the board?
Using gluten-free cake and treats allows for a gluten-free assortment without sacrificing variety.
- → What garnishes enhance the board's appearance?
Edible flowers and fresh mint sprigs add a festive and elegant touch to the dessert display.
- → How to serve when not eating immediately?
Cover and refrigerate the board; bring to room temperature about 20 minutes before serving for best flavor.