 Add to Pinterest
 There's something almost magical about the moment a donut emerges golden from hot oil, puffing up like it's breathing for the first time. I discovered that magic on a Saturday morning when my neighbor handed me a warm, glazed yeast donut still dripping with vanilla sweetness, and I realized right then that making these at home wasn't just possible—it was essential. The simplicity of the dough belies how rewarding the process becomes once you understand the rhythm of rising and frying. What started as curiosity about why bakery donuts tasted so much lighter than my attempts became an obsession with mastering the timing, the temperature, the exact moment to flip. Now these donuts have become my answer to almost every occasion that calls for something homemade and comforting.
I'll never forget watching my daughter's face light up when she bit into one of these still warm from cooling—she closed her eyes like she was experiencing something profound, and honestly, she was. That single reaction made all the careful attention to dough temperature and oil heat feel completely worthwhile. It's those small moments that turn a recipe from technique into tradition.
Ingredients
- All-purpose flour (3 1/2 cups): The foundation of everything—quality flour makes a noticeable difference, so don't skip the good stuff if you have it.
- Whole milk, warmed (1 cup): Warmth matters here; too hot and you'll kill the yeast, too cool and it'll take forever to bloom.
- Unsalted butter, melted (1/4 cup): The butter is what gives these donuts their tender crumb and rich flavor without overpowering the vanilla.
- Granulated sugar (1/4 cup): Just enough to feed the yeast and sweeten the dough subtly—the glaze is where the real sugar magic happens.
- Active dry yeast (2 1/4 tsp): Check the date on your yeast; old yeast is a silent killer of dough ambitions.
- Large eggs, room temperature (2): Room temperature eggs blend more smoothly into the dough and help create that tender texture.
- Fine salt (1/2 tsp): A small amount that strengthens the gluten without making the donuts taste salty.
- Neutral oil for frying (2 quarts): The oil is your medium for achieving that perfect golden exterior, so use something clean and flavorless.
- Powdered sugar, sifted (2 cups): Sift it first—lumps in glaze are the small disappointments that prevent perfection.
- Whole milk for glaze (1/4 cup): Adjusts the glaze thickness; add a touch more if it's too stiff or less if it pools.
- Pure vanilla extract (1 tsp): Pure vanilla makes a real difference—the fake stuff tastes hollow by comparison.
Tired of Takeout? 🥡
Get 10 meals you can make faster than delivery arrives. Seriously.
One email. No spam. Unsubscribe anytime.
Instructions
- Wake up the yeast:
- Combine warm milk and yeast in a small bowl and let it sit for 5 minutes until it looks foamy and smells alive. This is proof your yeast is ready to work; if it stays flat and quiet, your yeast has expired and it's time to get fresh.
- Build the dry foundation:
- Whisk together flour, sugar, and salt in a large bowl or stand mixer. This distributes the salt and sugar evenly before the wet ingredients join the party.
- Bring everything together:
- Add the yeast mixture, melted butter, and room-temperature eggs to the dry ingredients and mix until a sticky, shaggy dough forms. Don't worry if it looks rough—this is exactly right.
- Develop the dough:
- Knead on medium speed (or by hand) for 5–7 minutes until the dough becomes smooth, elastic, and springs back when you poke it. This is where the magic starts; the gluten is organizing itself into a network that will give your donuts their tender texture.
- Let it rise:
- Place the dough in a greased bowl, cover it with a damp cloth, and let it rise in a warm place until doubled in size—about 1–1.5 hours. The warmth of your kitchen matters; a cold room will take longer, a warm one might be faster.
- Shape with care:
- Turn the dough onto a floured surface, roll it out to about 1/2-inch thickness, and cut out donuts using a floured 3-inch cutter. Gather scraps gently and reroll them—the less you rough up the dough, the lighter your donuts will be.
- Arrange and rest:
- Place cut donuts and donut holes on a parchment-lined tray, cover loosely, and let them rise again for 30–45 minutes until they're puffy and jiggly when the tray moves. This second rise is what makes them airy; don't skip it or rush it.
- Heat your oil carefully:
- Bring oil to exactly 350°F in a deep fryer or heavy pot. Use a thermometer; guessing the temperature is how you end up with greasy donuts instead of golden ones.
- Fry with attention:
- Gently place donuts in hot oil in batches—don't crowd the pan or the temperature will drop. Fry for about 1–1.5 minutes per side until golden brown and floating, flipping only once. A slotted spoon is essential here.
- Cool slightly before glazing:
- Transfer fried donuts to a wire rack lined with paper towels. Let them cool just enough that the glaze won't slide right off, but not so long that they lose their warmth.
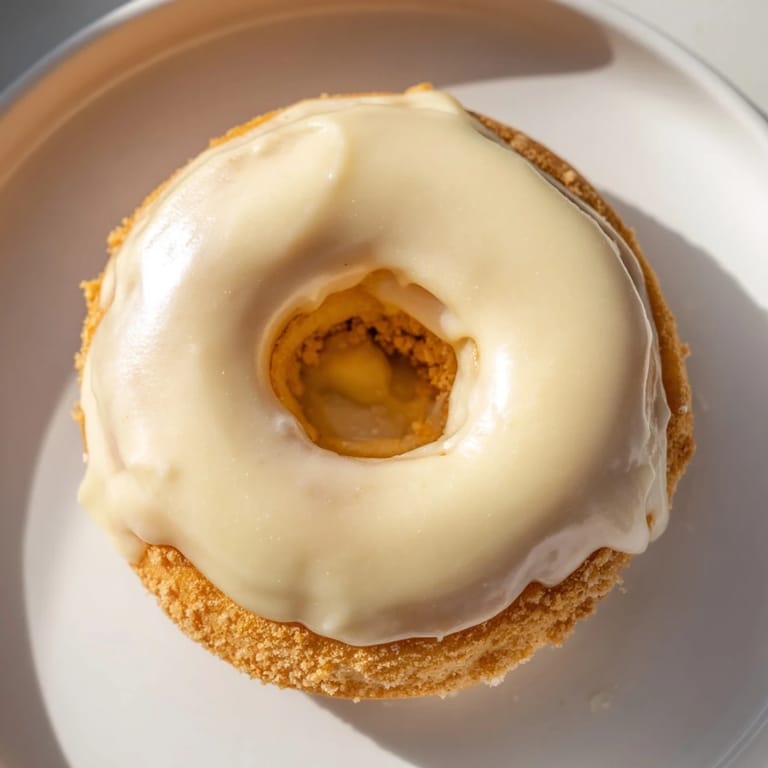
- Mix the glaze:
- Whisk powdered sugar, milk, vanilla, and salt until smooth and pourable. If it's too thick, add milk a little at a time; if too thin, add more powdered sugar.
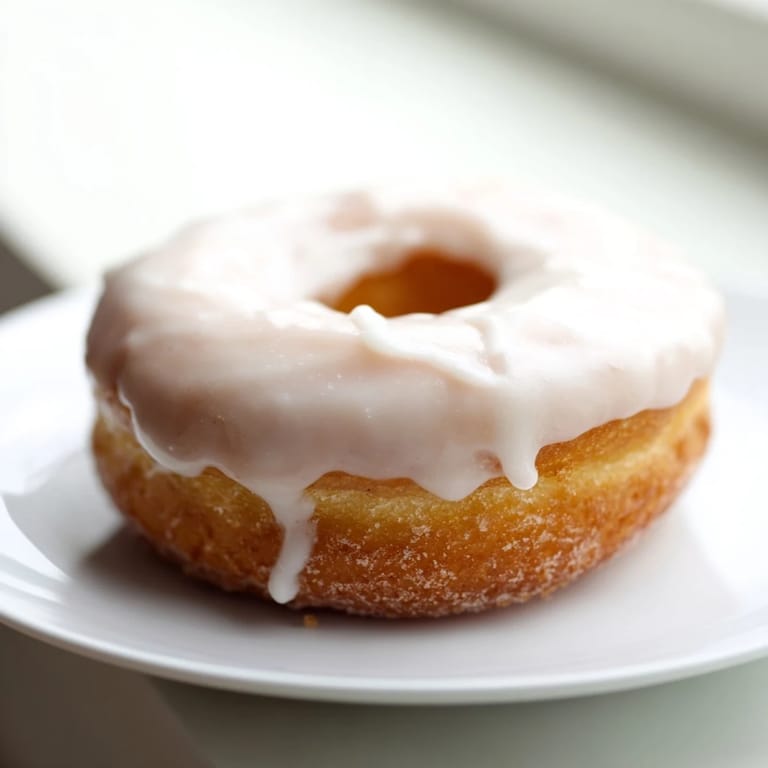
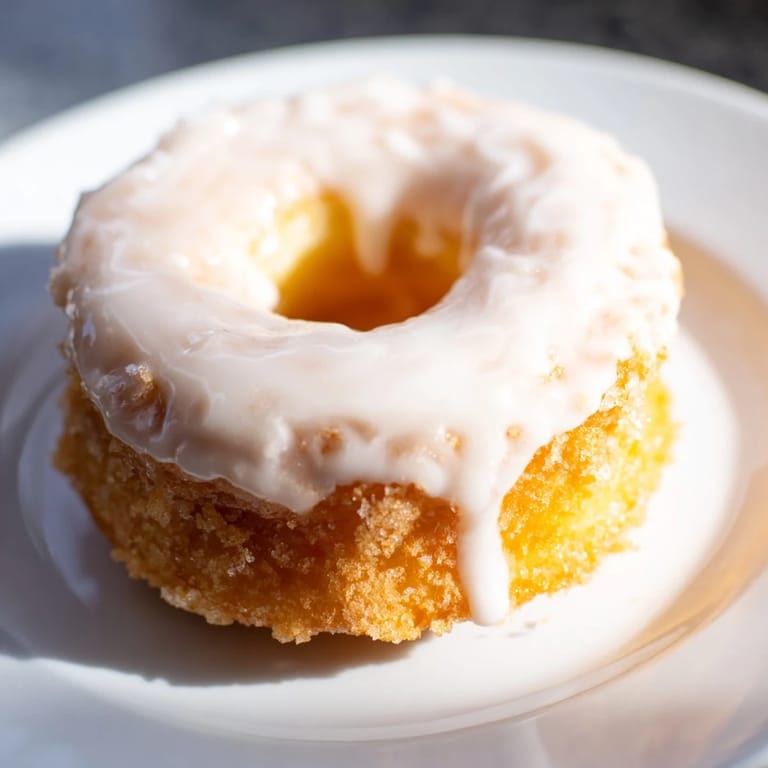
- Coat with finesse:
- Dip each warm donut into the glaze, let the excess drip away, and set it on the rack. Watch the glaze set as it cools—this is the final satisfaction of the whole process.
 Add to Pinterest
 The real payoff came when I realized these donuts could turn an ordinary Tuesday morning into something worth remembering. There's something about offering someone a homemade glazed yeast donut that says you care in a language everyone understands immediately.
The Science of Rise and Shine
Yeast donuts succeed because of the two-rise system—the first rise develops flavor and gluten strength, while the second rise aerates the dough one more time before frying. I learned this the hard way after skipping the second rise and ending up with donuts that were tender but had no height or lightness. The yeast is working for you both times, creating tiny gas bubbles that expand with heat in the oil, creating that signature airy interior. Understanding this rhythm changed everything about how I approached yeast-based doughs beyond just donuts.
Oil Temperature and Frying Technique
Getting the oil temperature exactly right is non-negotiable, and this is where a reliable thermometer becomes your best friend in the kitchen. Too low and the donuts absorb oil like sponges; too high and the outside burns while the inside stays raw. I discovered that even a 10-degree difference changes everything, so invest in a good thermometer and trust it completely. Gentle handling when placing donuts in the oil also matters—too much jostling can deflate them before they have a chance to fry properly.
Glaze Variations and Storage
The vanilla glaze I've given you is the baseline, but once you master it, the variations are endless and genuinely exciting to explore. A hint of grated nutmeg in the dough itself adds warmth without announcing itself loudly, while citrus zest in the glaze brings brightness that cuts through the richness beautifully. Almond extract makes a sophisticated swap for vanilla if you're feeling adventurous. Best enjoyed fresh, these donuts stay good in an airtight container for 1–2 days, though they're honestly most magical in the first few hours while they still have warmth and softness.
- Try adding a pinch of nutmeg to the dough for subtle warmth.
- Citrus zest in the glaze is a game-changer if you want brightness instead of pure sweetness.
- Store in an airtight container and refresh them gently in a low oven if needed the next day.
 Add to Pinterest
 Making glazed yeast donuts is easier than it seems once you understand the few things that actually matter—temperature, timing, and a little patience. I hope you find as much joy in biting into one of these as I do in making them for people I care about.
Recipe Questions & Answers
- → What makes the donuts light and airy?
The yeast fermentation and proper rising times allow the dough to develop air pockets, resulting in a soft and fluffy texture after frying.
- → How should I know when the oil is at the right temperature?
Heat the oil to 350°F (175°C); this ensures donuts fry evenly and develop a golden exterior without absorbing excess oil.
- → Can I substitute ingredients in the glaze?
Yes, almond extract or citrus zest can replace vanilla extract to offer a different aromatic profile while maintaining sweetness.
- → How long should the dough rise before frying?
The dough should rise about 1 to 1.5 hours until doubled in size, plus an additional 30 to 45 minutes after shaping to become puffy.
- → What tools are essential for preparation?
Key tools include a stand mixer or mixing bowl with spoon, rolling pin, donut cutter, deep fryer or heavy pot, slotted spoon, wire rack, and parchment paper.
- → How can I add more flavor to the donuts?
Adding a pinch of grated nutmeg to the dough or experimenting with different extracts in the glaze enhances the flavor profile.