 Add to Pinterest
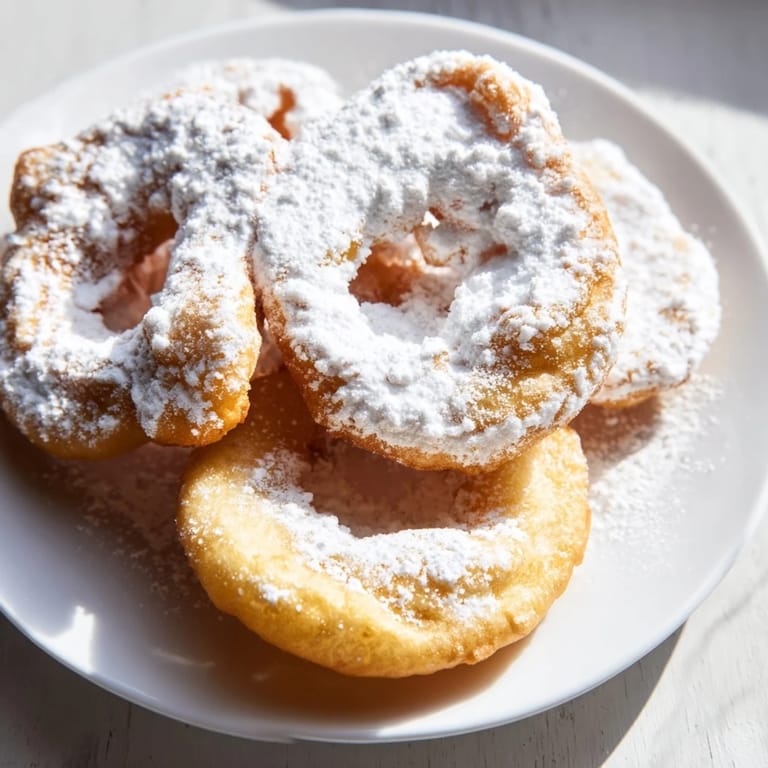
 There's something about the smell of oil heating up that takes me straight back to summer carnivals—that golden, almost buttery warmth filling the air. I'd watch the vendors work with such ease, their hands moving through the dough like they'd done it a thousand times. One quiet afternoon in my kitchen, I decided to stop wondering and start doing. The first batch was imperfect, slightly uneven, but when I bit into that warm, crispy shell, the whole reason for the tradition finally clicked.
I made these for my sister's book club once, thinking they'd be a small side note to the actual gathering. Instead, people came back for seconds while barely pausing their conversations, and I ended up making another batch halfway through the evening. It became the thing she asked me to bring to every event after that, and I never minded—there's a particular kind of joy in feeding people something that tastes like celebration.
Ingredients
- All-purpose flour (2 cups): The foundation of your dough; it gives the structure that lets these puff up beautifully when they hit the hot oil.
- Baking powder (2 tsp): This is what makes them light and airy inside, creating those little pockets that make each bite satisfying rather than dense.
- Salt (1/2 tsp): A small amount enhances the sweetness of the toppings and brings out subtle depth in the dough itself.
- Granulated sugar (2 tbsp): Mixed into the dough, it adds a gentle sweetness that isn't overwhelming and helps with browning.
- Unsalted butter (2 tbsp, softened): The secret to tenderness; softened butter distributes evenly and creates a delicate crumb structure.
- Whole milk (3/4 cup): Brings everything together with richness; whole milk makes a difference compared to water or lower-fat options.
- Vegetable oil (2 cups for frying): Use a neutral oil with a high smoke point; it needs to stay stable at 350°F without imparting flavor.
- Powdered or granulated sugar for topping: Applied while warm, it sticks to the surface and creates that signature sweet coating.
- Honey (optional): A drizzle adds complexity and keeps the surface from drying out too quickly once cool.
Tired of Takeout? 🥡
Get 10 meals you can make faster than delivery arrives. Seriously.
One email. No spam. Unsubscribe anytime.
Instructions
- Gather and mix the dry foundation:
- Whisk together flour, baking powder, salt, and sugar in a large bowl, breaking up any clumps as you go. This ensures the baking powder distributes evenly so every piece rises consistently.
- Work in the butter gently:
- Cut the softened butter into small cubes and work it into the flour mixture using your fingertips or a fork until it resembles coarse breadcrumbs. You want flaky texture, not a paste.
- Bring the dough together:
- Pour the milk in gradually while stirring, just until a soft dough begins to form. Stop before it becomes sticky; you're looking for something that barely holds together.
- Knead with a light touch:
- Turn the dough onto a lightly floured surface and knead for about one minute—just enough to make it cohesive, not tough. Overworking develops gluten, which makes them chewy instead of tender.
- Shape into rounds:
- Divide the dough into 8 equal pieces and pat or roll each into a disc about 1/4 inch thick. They don't need to be perfect circles; slightly rustic edges actually look better once fried.
- Heat your oil precisely:
- Use a thermometer and let the oil reach exactly 350°F in a deep skillet or heavy pot. The right temperature is critical—too cool and they absorb oil, too hot and they brown before puffing through.
- Fry with patience and attention:
- Carefully place one disc at a time into the hot oil and fry for 1 to 2 minutes per side, turning once, until golden brown and noticeably puffed. Don't crowd the pan, which lowers the oil temperature and creates uneven cooking.
- Drain and cool briefly:
- Use a slotted spoon or tongs to remove each piece to a paper towel-lined plate. Let them sit for just a minute so excess oil drains without them cooling too much.
- Coat while warm:
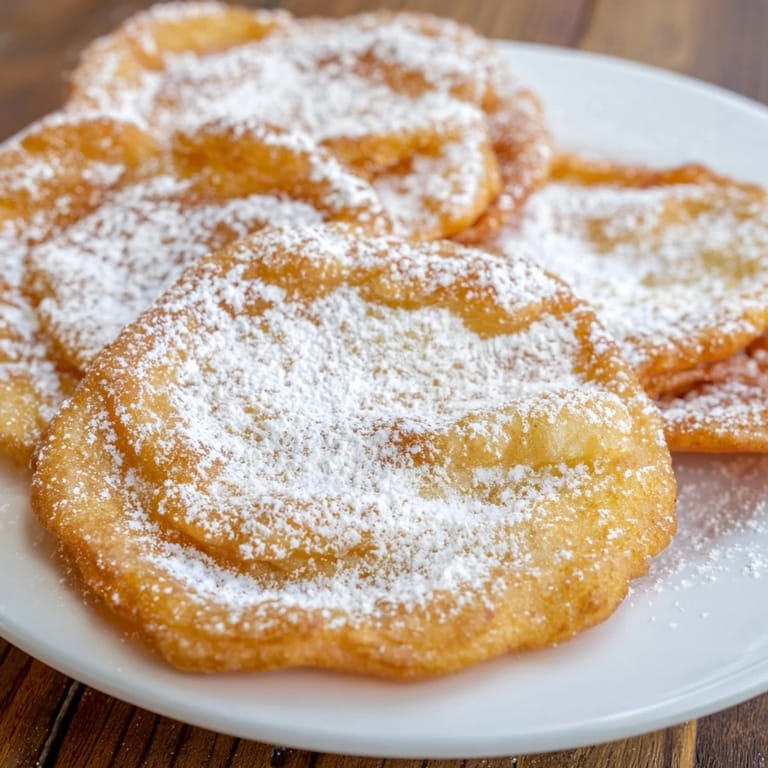
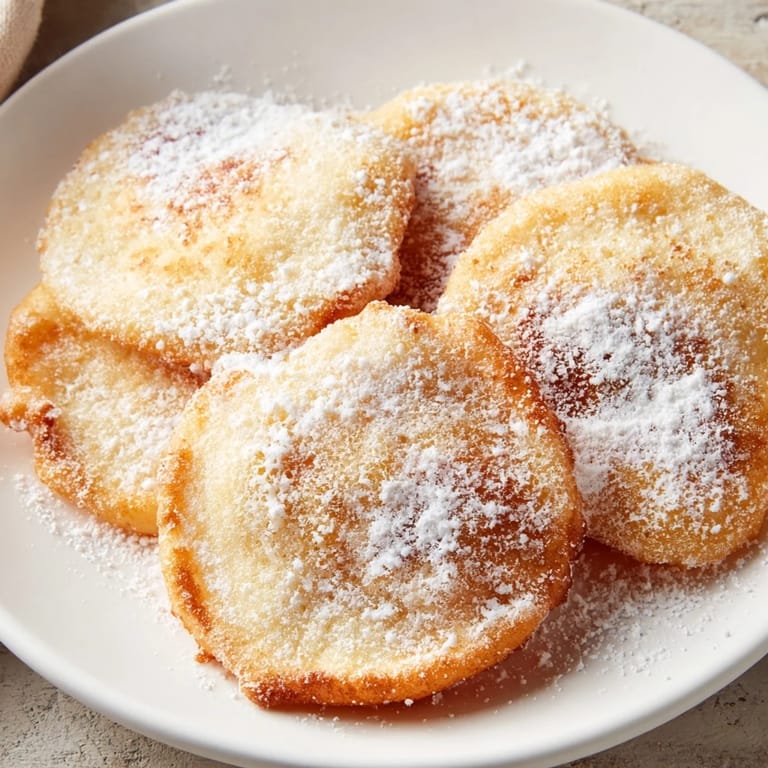
- While still warm, dust generously with powdered or granulated sugar, or drizzle with honey, depending on your preference. The warmth helps toppings adhere and brings out their sweetness.
 Add to Pinterest
 My nephew used to ask for these on his birthday instead of cake, and watching him bite into one with such genuine delight reminded me that sometimes the simplest foods carry the most meaning. There's something about sharing food that's warm and a little bit indulgent that makes people feel truly cared for.
Variations That Work
The beauty of fried dough is how flexible it is once you understand the base. I've made savory versions by skipping the sugar topping and brushing with garlic butter instead, which turns them into something completely different. Sweet variations are endless—cinnamon sugar, a light chocolate drizzle, or even a dusting of cardamom brings its own character.
Storage and Timing
These are truly best eaten within the hour while they still have that contrast between crispy exterior and tender interior. If you're making them ahead, the dough keeps covered in the fridge for up to a day, and you can fry pieces as needed—it only takes a few minutes per batch. Leftover fried pieces won't recapture their original texture, so it's better to think of this recipe as something you make fresh and eat right away.
Making This Your Own
Every time I make fried dough, I remember that recipes are really just starting points for conversation with your own kitchen and tastes. Trust your instincts with toppings and timing, and don't be afraid to make small adjustments based on what you notice the first time through. The more you make these, the more automatic the process becomes, which frees you up to focus on the joy of feeding people something warm and a little bit special.
- Add a pinch of cinnamon or nutmeg to the dough itself for subtle warmth that complements any topping.
- Serve alongside warm chocolate sauce, honey, or fruit preserves for those who want an extra layer of flavor.
- If you're frying for a crowd, have all pieces shaped and ready before you start; this keeps the oil temperature consistent.
 Add to Pinterest
 These warm, golden pieces of fried dough never fail to bring a moment of pure contentment—both in the making and in the eating. That's the whole point, really.
Recipe Questions & Answers
- → How do I achieve crispy fried dough?
Maintain oil temperature around 350°F to ensure the dough puffs and crisps quickly without absorbing excess oil.
- → Can I add flavors to the topping?
Yes, adding a pinch of cinnamon to the sugar topping enhances the flavor and adds warmth.
- → What oil is best for frying?
Use a neutral oil with a high smoke point, like vegetable oil, for the best results.
- → How thick should the dough discs be?
Roll or pat the dough to about 1/4 inch thick for even frying and puffed texture.
- → Can I prepare the dough in advance?
Yes, the dough can be prepared ahead and refrigerated, but fry when ready to maintain crispiness.