 Add to Pinterest
 My neighbor knocked on my door one Tuesday holding a casserole dish and asked if I had anything that tasted like lasagna but didn't require an engineering degree. I laughed and pulled out these rolls, which I'd been making since I needed something impressive but manageable for a potluck. She took one bite and declared it better than the layered version. Now she makes them every other week and texts me photos.
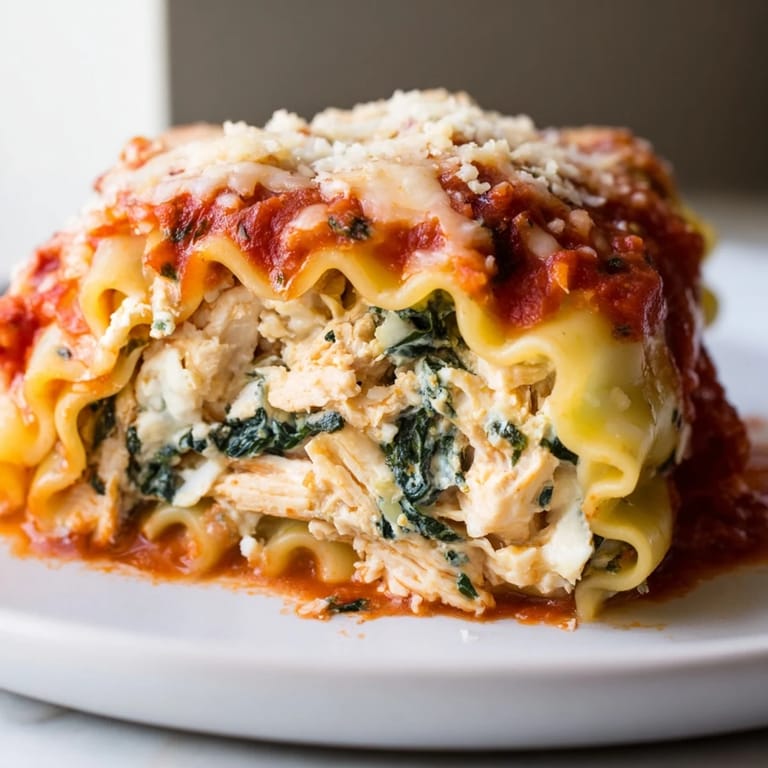
I made these for my brother's birthday dinner because he's obsessed with Italian food but hates waiting for lasagna to set. Watching him unroll one with his fork to see the filling made me realize how fun they are to eat. The kids at the table fought over the corner pieces with extra cheese. It became our family's new celebration dish without anyone officially deciding it.
Ingredients
- Cooked chicken breast, shredded: Rotisserie chicken works beautifully here and saves time, just pull the meat and chop it roughly so it blends into the filling.
- Fresh spinach, chopped: I prefer fresh because it has a brighter flavor, but frozen works if you squeeze every drop of water out or the filling gets soupy.
- Ricotta cheese: This is the creamy base that holds everything together, and using whole milk ricotta makes it taste richer without extra steps.
- Shredded mozzarella cheese: Divided between the filling and topping, it melts into gooey pockets and creates that golden crust everyone fights over.
- Grated Parmesan cheese: Adds a sharp, salty depth that balances the mild ricotta and makes the whole dish taste more complex.
- Large egg: Binds the filling so it doesn't fall apart when you slice into the rolls, I learned this after my first attempt oozed everywhere.
- Garlic, minced: Two cloves give just enough bite without overpowering the chicken, and I always mince it finely so no one gets a sharp chunk.
- Dried oregano and basil: These bring the Italian flavor without needing fresh herbs, though I'll toss in fresh basil at the end if I have it.
- Salt and black pepper: Season the filling well here because the noodles and sauce don't add much on their own.
- Lasagna noodles: Cook them just until al dente or they'll tear when you roll them, and lay them flat immediately so they don't stick.
- Marinara sauce: I use a good jarred sauce when I'm busy, but homemade makes it feel special if you have thirty extra minutes.
- Mozzarella and Parmesan for topping: This creates the bubbly, golden layer that makes the dish look as good as it tastes.
- Chopped fresh parsley: Optional, but it adds a pop of color and freshness that makes the plate feel complete.
Tired of Takeout? 🥡
Get 10 meals you can make faster than delivery arrives. Seriously.
One email. No spam. Unsubscribe anytime.
Instructions
- Prep the oven and dish:
- Preheat your oven to 375°F and grease a 9x13 inch baking dish lightly so the rolls don't stick to the bottom. This step seems small but it matters when you're serving.
- Cook the noodles:
- Boil the lasagna noodles in salted water until al dente, then drain and lay them flat on a towel. If they overlap or sit in water, they'll glue themselves together and tear when you try to roll them.
- Make the filling:
- Combine the shredded chicken, spinach, ricotta, mozzarella, Parmesan, egg, garlic, oregano, basil, salt, and pepper in a large bowl. Mix it thoroughly so every bite has a little of everything.
- Sauce the dish:
- Spread one cup of marinara across the bottom of your baking dish. This keeps the rolls from drying out and adds flavor to the bottom layer.
- Fill and roll:
- Spread about a quarter cup of filling evenly over each noodle, then roll it up from the short end and place it seam side down in the dish. Work gently so the noodles don't split.
- Top and bake:
- Pour the remaining marinara over the rolls, sprinkle with mozzarella and Parmesan, then cover with foil and bake for 25 minutes. Remove the foil and bake another 10 minutes until the cheese is golden and bubbly.
- Rest and serve:
- Let the rolls sit for five minutes before serving so the cheese sets slightly and they don't fall apart on the plate. Garnish with parsley if you want it to look fancy.
 Add to Pinterest
 My friend brought her picky toddler to dinner and I thought there was no way he'd eat these. He asked for seconds and then tried to take a third roll off his mom's plate. She looked at me like I'd performed magic, but really it's just that kids love anything they can pick up and eat with their hands. That night I realized this dish works for everyone.
Making It Your Own
I've swapped the chicken for turkey after Thanksgiving and it tasted just as good, maybe even better with the darker meat. My cousin adds sautéed mushrooms and roasted red peppers to the filling, which makes it heartier and more colorful. You can also use whole wheat noodles if you want to feel a little healthier, though I won't pretend it changes the experience much. The fun part is that the rolls hold up to almost any addition you throw at them.
Storing and Reheating
These rolls keep well in the fridge for up to three days, and I actually think they taste better the next day after the flavors settle. Reheat them covered in the oven at 350°F for about 20 minutes, or microwave individual rolls for a quick lunch. I've frozen assembled unbaked rolls before and baked them straight from the freezer, adding an extra 10 minutes under the foil. They're one of those rare dishes that survive the freezer without losing their texture.
Serving Suggestions
I usually serve these with a simple arugula salad dressed in lemon and olive oil, which cuts through the richness. Garlic bread is always a hit, though it's not necessary since the rolls are already filling. A glass of red wine makes it feel like a real occasion, but honestly they're just as good with water and a weeknight mood.
- Pair with a crisp green salad to balance the creamy filling.
- Serve garlic bread on the side if you want extra comfort.
- A light red wine or sparkling water with lemon makes it feel special.
 Add to Pinterest
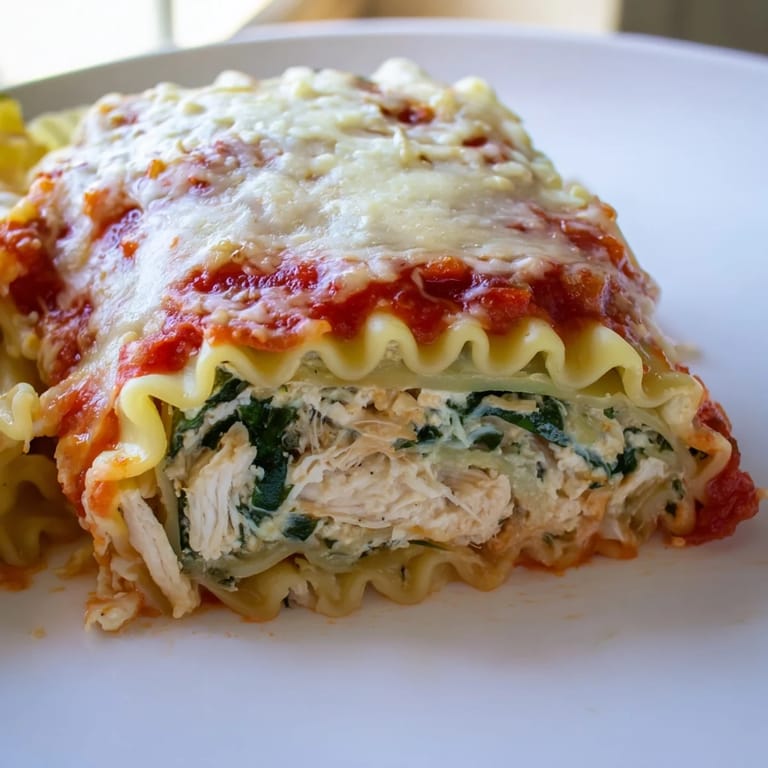
 Every time I pull these out of the oven, someone in the kitchen says they look too pretty to eat, and then we eat them anyway. They've become my answer to almost every dinner invitation, and I've stopped apologizing for making the same thing twice.
Recipe Questions & Answers
- → Can I prepare these rolls ahead of time?
Yes, you can assemble the rolls up to 24 hours in advance. Cover the baking dish with plastic wrap and refrigerate. When ready to bake, add 5-10 minutes to the cooking time since the dish will be cold.
- → How do I prevent the noodles from sticking together?
After cooking the lasagna noodles, lay them flat on a clean kitchen towel to cool. You can also lightly oil them to prevent sticking. Handle them gently when rolling to avoid tearing.
- → What are some filling variations?
Try adding sautéed mushrooms, roasted red peppers, or sun-dried tomatoes to the filling. For a vegetarian version, omit the chicken and use extra spinach, mushrooms, or include zucchini. Ground turkey is also an excellent substitute for chicken.
- → Can I freeze these rolls for later?
Absolutely. Freeze the assembled, unbaked rolls in the baking dish for up to 3 months. Bake directly from frozen, adding 15-20 minutes to the cooking time. Ensure the rolls are covered with foil to prevent drying out.
- → What should I serve alongside this dish?
A crisp green salad with vinaigrette pairs beautifully. Garlic bread is the classic accompaniment. You could also serve with roasted vegetables like broccoli or Brussels sprouts for a balanced meal.
- → How can I make this dish healthier?
Use whole wheat lasagna noodles for added fiber, and consider using part-skim ricotta and low-fat mozzarella. Increase the spinach portion and add extra vegetables like mushrooms or zucchini to boost nutrition without affecting flavor.