 Add to Pinterest
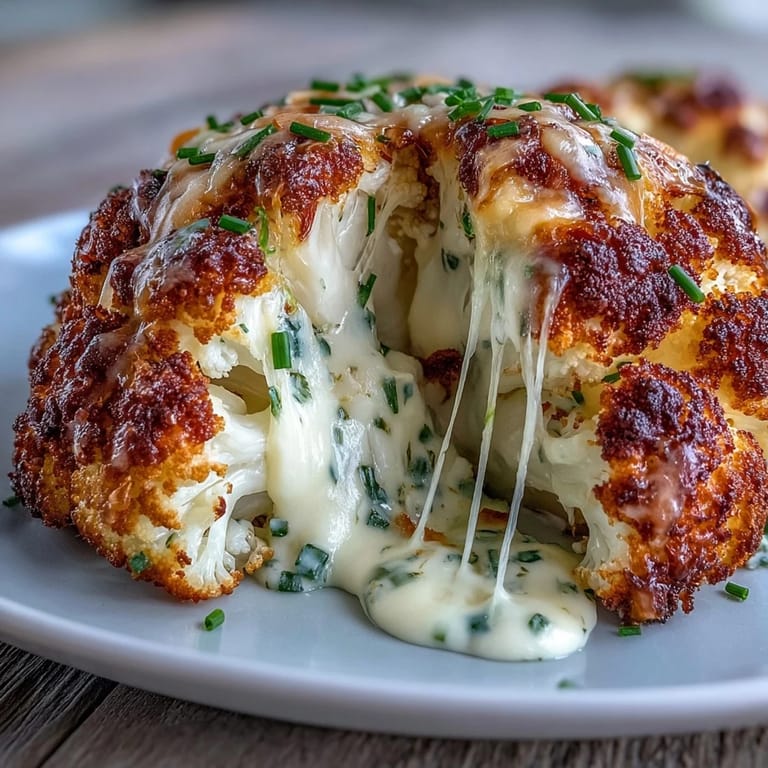
 My sister called it my "vegetarian showstopper moment," and honestly, the first time I roasted a whole cauliflower head stuffed with three kinds of cheese, I understood the hype. There's something undeniably theatrical about pulling a golden, bubbling cauliflower from the oven that makes everyone forget they're eating vegetables. It happened on a random Tuesday when I was tired of the same roasted veggie routine and decided to treat a head of cauliflower like it deserved center stage. The result was so stunning that even my cheese-loving meat-eating friends asked for seconds.
I made this for my dinner party last autumn, and what I remember most isn't the compliments, but the moment my neighbor peeked into the kitchen, inhaled deeply, and said, "That smells like fancy restaurant food." That single comment made me realize how unfamiliar most people are with cauliflower that doesn't taste like an afterthought. From that night on, it became my secret weapon for impressing guests without breaking a sweat.
Ingredients
- 1 large whole cauliflower (about 1 kg): Choose one with tightly packed florets and a sturdy base that will sit flat without wobbling; this keeps it stable while roasting.
- Olive oil, salt, and black pepper: These simple seasonings let the cauliflower's natural sweetness shine through rather than mask it.
- 150 g cream cheese, softened: The base of your filling, bringing a silky richness that binds everything together beautifully.
- 100 g shredded mozzarella cheese: This melts smoothly and adds that stretch factor that makes the filling feel luxurious.
- 50 g grated Parmesan cheese: A small amount delivers sharp, nutty depth without overwhelming the more delicate flavors.
- 2 tbsp chopped fresh chives and 1 minced garlic clove: These aromatics wake up the filling and keep it from tasting one-dimensional.
- ½ tsp smoked paprika and ¼ tsp ground nutmeg: The paprika adds warmth and a whisper of smokiness, while nutmeg brings an unexpected subtle complexity that people notice but can't quite name.
- 1 tbsp milk: Just enough to loosen the mixture and help it distribute evenly through the cauliflower's crevices.
- 50 g shredded cheddar cheese and 2 tbsp breadcrumbs: The topping creates a golden crust that contrasts with the creamy interior.
- 1 tbsp melted butter: This helps the topping brown and bind into a cohesive, crispy layer.
Tired of Takeout? 🥡
Get 10 meals you can make faster than delivery arrives. Seriously.
One email. No spam. Unsubscribe anytime.
Instructions
- Heat your oven and prep the workspace:
- Preheat to 200°C (400°F) and line your baking tray with parchment paper; this prevents sticking and makes cleanup effortless.
- Ready the cauliflower:
- Gently peel away the outer leaves and trim the base so the head sits flat and stable on the tray. Keep the core intact because it's what holds everything together.
- Blanch with care:
- Bring a large pot of salted water to a boil and carefully place the whole cauliflower in it, cooking for 8–10 minutes until just tender but still firm enough to hold its shape. You want it slightly undercooked at this stage because it will finish in the oven.
- Make the filling:
- While the cauliflower cools slightly, blend the cream cheese, mozzarella, Parmesan, chives, garlic, smoked paprika, nutmeg, and milk in a bowl until completely smooth; taste it and adjust seasonings if needed.
- Stuff with intention:
- Using a small sharp knife, make careful cuts into the base and between the florets to create pockets for the cheese filling. Work slowly so you don't split the cauliflower, then spoon the filling into each crevice, pressing gently with your fingers or the back of a spoon.
- Season the outside:
- Brush the entire cauliflower head with olive oil and sprinkle generously with salt and pepper; this helps it brown beautifully and seasons every bite.
- Add the crown:
- Mix the shredded cheddar, breadcrumbs, and melted butter together until it resembles coarse sand, then scatter it evenly over the top of the cauliflower.
- Roast until golden:
- Bake for 40–45 minutes, watching for the top to turn golden brown and the filling to bubble slightly at the edges. A knife should pierce the cauliflower easily when it's done.
- Rest and serve:
- Let it sit for 5 minutes out of the oven so the filling firms up just enough to hold together, then slice into wedges and serve warm.
 Add to Pinterest
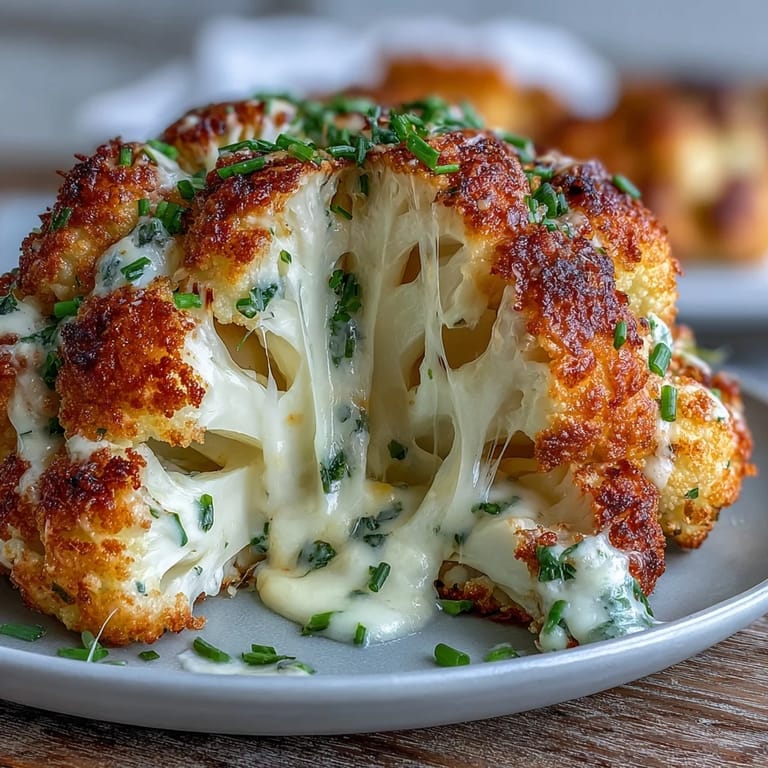
 There was something quietly magical about the moment I sliced into that first roasted cauliflower at the dinner table and the molten cheese began oozing out onto the plate. My guests leaned forward as if watching a magician reveal a secret, and suddenly, cauliflower wasn't the vegetable they tolerated—it was the dish they came for. That's when I knew this recipe had crossed over from clever dinner idea to something that genuinely belonged in my regular rotation.
Choosing Your Cauliflower Wisely
The success of this dish hinges entirely on starting with a proper cauliflower head. Look for one that feels heavy for its size, has bright green leaves still attached, and shows no dark spots or soft patches. A smaller head will cook faster and feel more delicate, while a larger one becomes more dramatic on the table but requires slightly longer roasting. I've learned that the best heads are usually found mid-week at the market, before the weekend rush picks through everything.
Flavor Variations That Actually Work
The base recipe is a blank canvas, and I've experimented with countless additions over the past year. Sun-dried tomatoes stirred into the filling add a tangy, concentrated burst that cuts through the richness beautifully. Sautéed mushrooms bring an earthy, umami depth that makes it feel more substantial, while a handful of fresh herbs like dill or tarragon can shift the entire flavor profile toward lighter, brighter territory. The key is not to overcomplicate it; one or two additions is the sweet spot, because cauliflower itself already has such a delicate, sweet flavor that deserves respect.
- Swap chives for fresh parsley, dill, or tarragon depending on your mood or what's growing in your garden.
- Stir in 3–4 chopped sun-dried tomatoes or 50 g sautéed mushrooms to the cheese filling for dimension.
- A pinch of cayenne or white pepper can replace the smoked paprika if you want a sharper kick instead of warmth.
Serving and Pairing Ideas
This cauliflower is confident enough to be the main event, but it also plays beautifully with other dishes. A crisp green salad dressed in lemon vinaigrette feels like the natural partner, cutting through the richness with brightness and acidity. Roasted root vegetables like carrots or beets alongside it create a complete, elegant plate, while crusty bread is always welcome for catching any of the cheesy drippings. I've even served it cold the next day, sliced and drizzled with a bit of extra virgin olive oil, and it's honestly just as delicious.
 Add to Pinterest
 This recipe transformed how I think about cooking vegetables, teaching me that the most memorable dishes are often the ones that look harder than they actually are. Every time I make it, someone at the table mentions how they never thought about cauliflower this way before, and that reminder alone makes the effort worthwhile.
Recipe Questions & Answers
- → Can I prepare this ahead of time?
Yes, you can blanch the cauliflower and prepare the cheese filling up to a day in advance. Store them separately in the refrigerator. Stuff and bake just before serving for the best texture and flavor.
- → What other cheeses work well in the filling?
You can substitute Gruyère for a nutty flavor, add sharp cheddar for extra tang, or incorporate goat cheese for a creamy tang. Just keep the total cheese quantity similar for proper consistency.
- → How do I know when the cauliflower is done?
The cauliflower is ready when it's golden brown on top, the cheese is bubbling, and a knife inserted into the center slides in easily with no resistance. This usually takes 40–45 minutes at 200°C.
- → Can I make this dairy-free?
You can use vegan cream cheese and dairy-free shredded cheese alternatives. Nutritional yeast adds a cheesy flavor, and coconut yogurt can replace the cream cheese base. The texture may vary slightly.
- → What should I serve with this dish?
A crisp green salad with vinaigrette balances the richness perfectly. Roasted vegetables, garlic bread, or a light grain salad like quinoa also complement this dish beautifully as part of a larger spread.